
After two days of charging, I was ready to try the NextGen Remote Extender. The first step was to take the batteries out of the charger and put them in the remote. It was at this time that I realized that I had been charging one of the batteries upside down.
Make sure that when you insert the battery into the transmitter, you put the end with the bump in and leave the flat end out as shown above.
Luckily the secondary battery charged just fine, and swapping them out put me back on track. After putting the battery in the transmitter, I put the transmitter in the sleeve, and then the whole assembly went into the remote easily and cleanly.
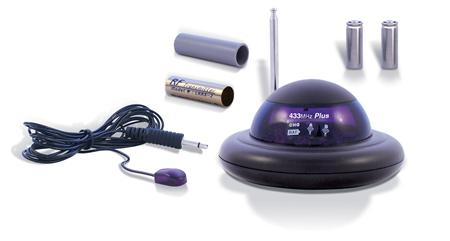
The rest of the installation went very quickly. Plug the remote extender’s receiver into any wall outlet and extend the antenna. Plug the blaster cable into its jack and put the little bulb in front of the thing you want to control. Voila!
I didn’t have any problems after that. It just worked as advertised! All of a sudden I could use the same remote anywhere in the house!