
The problem is, they all kinda look alike, right? If you have decided to change your DIRECTV LNB you have several choices. Pick the right one and you will have reliable service for years to come. Pick the wrong one and you’ll lose your investment as the LNB you just bought fries itself instantly. So, choosing correctly is important. This guide will help you pick the right LNB for you whether you are just looking to replace what you have now, or whether you decide to upgrade.
This document is available in PDF format! Click here to download!
Round dishes and LNBs
Before starting to upgrade, look at the different types of LNBs out there and figure out what you have.
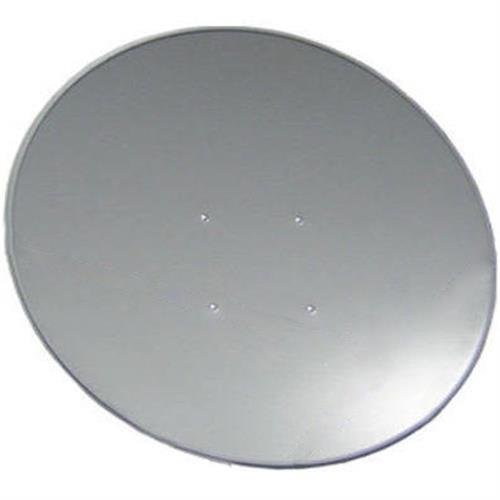
Round dishes
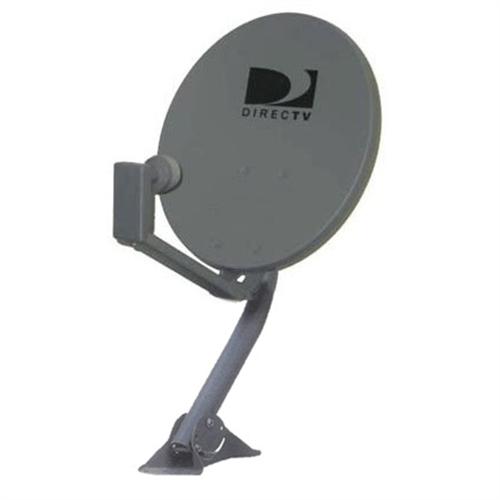
Round dishes are used for standard definition service. They are easy to aim and are popular among campers, RVers and other folks who put up dishes and take them down frequently. This type of dish uses a single-head, dual LNB: CalAmp’s Dual Output DBS (150517) from Solid Signal which is easy to install. If you have an very old dish it may have a dual-head LNB. This new LNB design will replace that.
Slimline dishes and LNBs
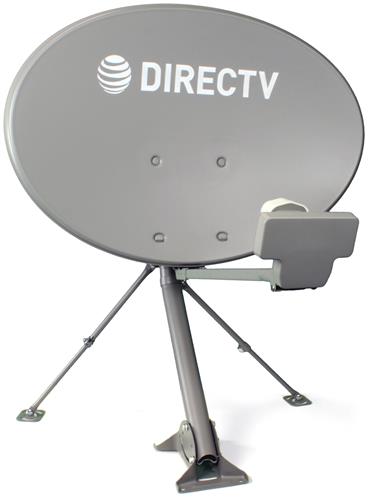
Slimline dishes are used for high definition service. They are easy to spot due to their oval shape and sometimes have the word “Slimline” in script across the reflector (the back part.)
Slimline dishes have two different LNBs, and can be SWM-enabled or “legacy” (meaning not SWM-enabled.)
Slimline-5 LNB
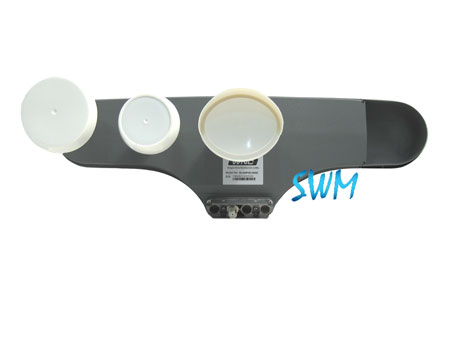
What you see above is the Slimline-5 LNB. It will receive broadcasts from all five satellite locations used by DIRECTV for its English-language programming. A SWM-enabled LNB is shown above; we’ll explain why it makes a difference later.
Slimline-3 LNB
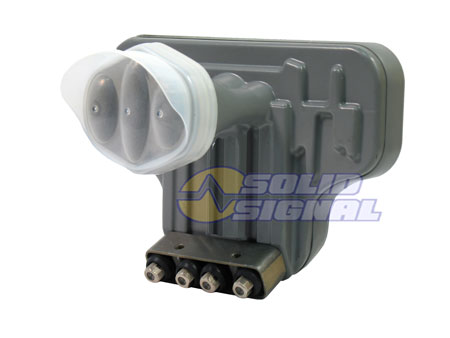
This is the Slimline-3 LNB. It only receives broadcasts from DIRECTV’s three primary locations. Most HD programming is located there but depending on where you are, your local channels may come in on a different satellite, meaning that you will need the Slimline-5 LNB.
Other Dishes and LNBs
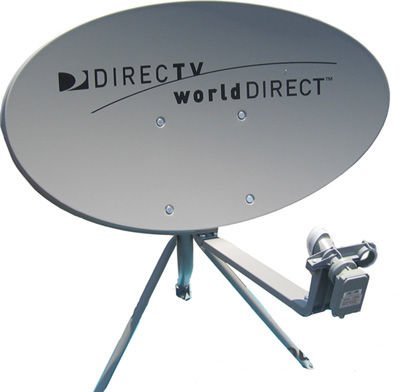
This is the WorldDIRECT International DISH for DIRECTV. It looks a lot like the Slimline dish but is even wider and the LNB is very different. These dishes will often say “WorldDIRECT” on the reflector (the back part.) If you have this dish, you’re using it for international programming. The LNB is not sold separately so if it does go out you must replace the dish.
This is a typical installation of the Alaska/Hawaii dish for DIRECTV. These dishes are only used where it’s not possible to get reception with a regular dish. They can have a single reflector or, as shown in this picture, dual reflectors. In order to replace these LNBs, you will need the DIRECTV DTVAHKAKUKIT DIRECTV 99 101 And 103 LNB Kit for use with 1.2 Meter Dish (Alaska/Hawaii) (DTVAHKAKUKIT) from Solid Signal) and possibly the DIRECTV DTVAH1019KIT 110 119 LNB Kit Alaska And Hawaii (DTVAH1019KIT) from Solid Signal) (used for the second reflector.)
Other Dishes
If your dish does not look like one of these it may be obsolete. DIRECTV made several dish designs in the 2000s that proved less reliable and if you have one of these, it’s best to replace the entire dish.
Do you have SWM?
DIRECTV’s Single Wire Multiswitch technology (SWM) makes it easy to wire your home with a single wire to each receiver or DVR. However, using the wrong LNB with a SWM system can lead to broken equipment.
The easiest way to figure out if you have a SWM system is to press the {DASH} button on your DIRECTV remote. It’s to the left of the zero. If you have a SWM system, you’ll see a display like this:

If it says SWiM Connected, you have the SWM system. Another way of checking is to look for the SWM power inserter or SWM multiswitch in your home. If you have something that looks like this (it may be gray or black):
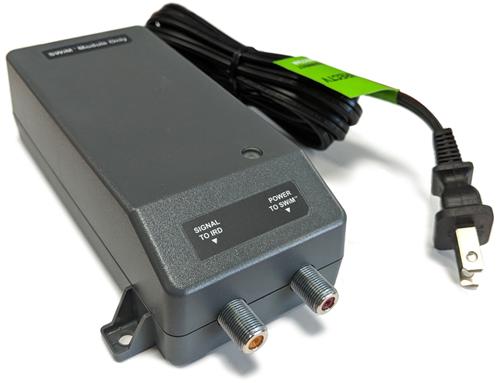
or this:
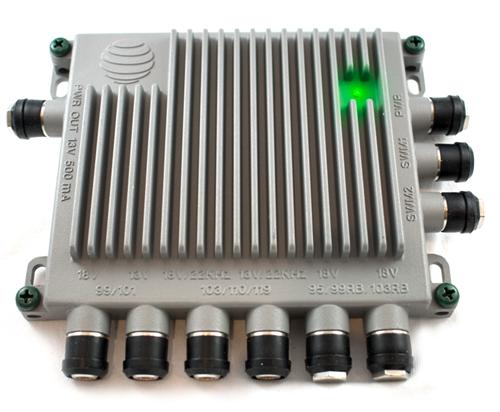
you have a SWM system. If you use the wrong LNB with a SWM system, you will destroy it! It’s important to be careful.
Do you need a Single-Wire upgrade?
![]()
If you don’t have a SWM system, this might be the time to consider upgrading. SWM systems are easier to wire and give the option of choosing DIRECTV’s new Genie DVR and Genie clients for more power and smaller size. Upgrading can be done quickly and all currently sold receivers are compatible. If you have older receivers you may want to call for options, or just upgrade them at the same time.
If you’d like to know more about doing a Single-Wire upgrade by yourself, check out our exclusive White Paper.
Inspecting the old LNB
Of course, the easiest way to know which LNB to buy is to inspect the old one. If you are comfortable going on the roof, it’s easy to see the LNB type. You may even be able to use a pair of binoculars or a zoom lens to see. If you are going up on the roof, it’s a good idea to use a pencil to mark the location of the dish on the back swivel mount. That way it will be easy to tell if you bump it out of alignment. Click here for a current list of markets that require the Slimline 5 LNB.
First, confirm that you have a Slimline dish and not an international dish by comparing it to the pictures above. Most likely you would know if you had an international dish. If you don’t watch non-English programming, you probably don’t have an international dish.
Then, look at the LNB on the front of the dish. If it is very wide, it’s a Slimline-5 LNB, and if it is more compact and shaped more like a closed fist, it’s a Slimline-3 LNB.
Now, look at how many cables are coming out of the LNB. In general it will be either one or four. If there is only one cable, that is a SWM-enabled LNB. If there are four cables, it is a “legacy” LNB. Note: Just because you have a SWM system does not mean you have a SWM LNB. You may have an external multiswitch that needs all four cables run to it.
If you connect the wrong LNB type it will not work and might destroy the LNB.
Which LNB to choose
The easiest repair option at this point is to replace the LNB with the exact same model. If you have a Slimline-5 LNB and want to replace it with a Slimline-3 LNB, it can be done but in general this is an unnecessary step and may lead to you losing some channels.
Here are the different LNBs. Click to go to the order page for each one.
“Legacy” LNBs designed to accept four wires
DIRECTV SL5 SlimLine Five LNB Ka/Ku Slim Line LNB for Satellite Dish (SL5) from Solid Signal
DIRECTV SL3 SlimLine Four Out Ka/Ku Slim Line LNB (SL3) from Solid Signal
SWM-enabled LNBs designed to accept only one wire
DIRECTV SL5-SWM SlimLine Single Wire Ka/Ku Five LNB With Built-In Multiswitch (SL5-SWM) from Solid Signal
DIRECTV SL3-SWM SlimLine Single Wire Ka/Ku Triple LNB With Built-In Multiswitch (SL3-SWM) from Solid Signal
When your new LNB comes, go up on the roof and carefully mark the position of the dish on the mount in case you bump it. Also, unplug the SWM power inserter if you have one.
There should be two screws at the bottom of the LNB arm that will let you disconnect the LNB. Use a 7/16″ wrench to disconnect the cables. Then, remove the old LNB and connect the new one. If you have a legacy LNB, you don’t have to connect the same wires into the same connection, but it might be easier. Make sure there is enough slack to form a drip loop, then slide the LNB onto the arm and re-attack the screws.
Plug in the SWM power inserter if you have one, and your system should be ready to go!