

My son asked me about a device that he came across on Amazon. He wanted to know if it would really save on his electric bill.
The device is the “Heunwa Power Save, 90V-250V 30KW Electricity Saving Box, Energy Saver Saving Device for Household Office Market Factory(US Plug)”
It is available at: https://www.amazon.com/dp/B07FSQTBTQ
See a demo video below:
Let me first point out three things,
- This is not the only purported power saving device on the market.
- None of these actually save you money on your electric bill.
- Using some of them will actually increase your electric bill a little.
I will skip #1 since you can do your own search to find the different devices. Go to Amazon or eBay, and any other similar site, and you’ll probably find a number of different claims of power saver devices. Search on Google, or with DuckDuckGo.com, and you’ll find some of the pros and cons as well.
All of these “power saving” devices do the same thing, which is to add capacitance to the AC power line. This improves the Power Factor (PF) for an inductance device, like a fan, electric motor, old florescent light ballast, and voltage transformers. By adding capacitance to the circuit, you increase the Power Factor closer to 1 (one), which means you’re decreasing the Volt-Amps value closer to the real-power used value as measured in Watts which is what the electric power company charges you for.
The way the power saver does this – as the demo above shows.
is by decreasing the current measured in Amps, or in this case, milliamps (mA).
The device tested showed it decreased the current for an old ballast florescent light from 800 mA (0.80A) to 600 mA, for a decrease of 200 mA. So, assuming a 120Volt AC line, they have improved/decreased the Volt-Amps by about 25%. Volts = 120, Amps = 0.8 so Volt-Amps (VA) = 120 X 0.8 = 96 VA, and for the “Saver” value 120 X 0.60 = 72 VA for a difference of 24 VA and 24/96 = 0.25 or a savings of 25%.
However, the electric company does not charge for Volt-Amps used, they charge for the Real Power (Watts, or KWatts) used, and those don’t change. Well sort of…
It turns out that some of these “Power Saver” boxes have been shown to use about 100 mA with or without anything else plugged in with them. They use 120 V X 0.10 A = 12 VA, somewhere around 12-13 Watts as a guesstimate. I did not buy one of these boxes; instead, I bought two 5 µF AC 450 V capacitors and I made my own box. Since I did not buy a box, I did not have the LED circuitry that was using 100mA, and so I was unable to measure that value for myself. I’ll have to take Mr. ElectroBOOM’s word. You can see his site at: https://www.electroboom.com/
Let’s now assume that the florescent light in the demo was a 60-Watt light bulb. The real power used is then around 60 W. But we just saw that using the “Power Saver” box reduced the current used, which, in turn reduces the VAs used. While this does improve the PF (power factor) it, unfortunately, does NOT reduce the Watts of the light bulb used.
PF = 60W/(120V X 0.800A) = 0.625 and 60W/(120V X 0.600A) ~ 0.833.
So, while we have improved the power factor, we have not changed the number of watts used and so we have not reduced our Real Power consumption. The bottom line is that the electric company bill is the same as it was before we used the “Power Saver.” I did not have any old ballast-driven florescent lights available in my house, so the best I could do was to use a 100W fan for my tests. I’ll get to those results a little later.
Back again using the power saver and florescent light. In all likelihood you will not have that light on for 24 hours every day for a month. Let’s assume you have it on for only eight hours a day. The “Power Saver Box,” on the other hand, is plugged in and running 24 hours a day because the instructions say to leave it in so it can “save” electricity whenever something on the line is used. But for this analysis, we’re assuming that only the light is on this line. (In fact it doesn’t matter one bit if other things are on the line since this box only improves the Power Factor and it does not reduce the Watts used.)
That means for 24 hours a day, while the light is on or off, the “Power Saver” box is still running. It uses about 100 mA, and so it is using at least 12 Watts of Real Power. So, 12 W X 24 hr = 288 = 0.288 kWh/day and for the month (say 30 days) that comes to an additional 8.64 kWh on the electric bill, for each of these boxes you’re using. So the power saver box is increasing your electric bill by more than 8 kWh per month, every month.
There are other people who are educating the general public to the “Power Saver” false claims. Here are just two I thought interesting or well done:
The first is titled, “Power Saver Scam EXPOSED!” put up on Jan 11, 2019, with 2,750,947 views as of 10/05/2020. By electroBOOM “Power Saver Scam EXPOSED!” at
Also, see “Teardown and test of a home power saving plug,” by bigclivedotcom. Located at:
It had 396,762 views as of 10/05/2020 and was uploaded on Nov 29, 2014.
Bigclivedotcom explains that the box is trying to do a Power Factor correction. His explanations are very good. He uses more math than most people want to see, I think, but he shows the same things as electroBOOM but slower so it’s easier for folks not familiar with these terms to understand them. He also takes the time to complete a schematic of this circuit for us. Well done!
On the other hand, here is one:
which does nothing but continue to spout the company line that this device saves you money on your electric bill. No analysis, no math, no taking the unit apart to find out what’s in it or figuring out what it’s doing or even trying to find out if the claims are true. No, this guy simply repeats the claims and he actually seems to believe them. But, he offers no proof, not even a scam proof like the one used showing a decrease in mA used but not showing if there’s a corresponding change in the Watts used. (I thought I should at least show the other side of the story and it’s good for a laugh too.)
Last, I want to include a link to the Wikipedia article on Power Factor for those who want to learn about what it is and what it means: https://en.wikipedia.org/wiki/Power_factor
Next I want to explain how I’m doing my tests.
I’m going to do the same kind of experiment (demonstration) that you saw in the first YouTube demo above only I’m going to measure the Real Power (Watts) used with and without the box.
Since these devices are mostly just a capacitor or two with some LEDs to show if the box is plugged in, I figured it would be less expensive if I built my very own “Power Saver” box with two 5 µF capacitors, which can be switched in or out of the circuit one at a time. I also have three LEDs to indicate: Green = Power to the box, meaning it is plugged into an AC socket. Red = Capacitor 1 is turned on, Blue = Capacitor 2 is turned on. I can test if 5 or 10 µF is better for increasing the power factor (PF) and to see if it makes any difference with the Real Power in Watts that the electric company uses to figure out your bill.
It took a day or two to think out how I wanted to build this and what the wiring would look like, and then about four to eight hours to actually build and test the unit.
Here’s the schematic for my test “Power Saver” box:
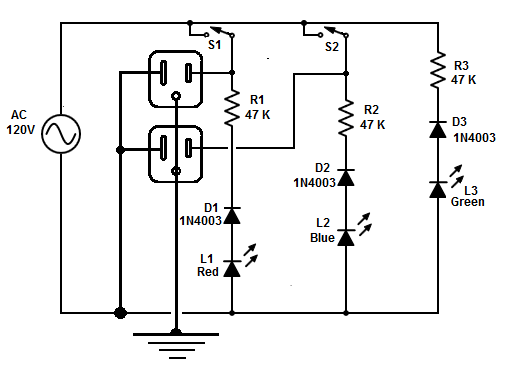 Figure 1: “Power Saver” Schematic
Quick update: R3 above should have been listed as 100 KΩ not 47 KΩ and second, even with these values the LEDs were really too bright as just power on indicators. I found that using R1 = R2 = 100 KΩ and R3 = 200 KΩ lowered the brightness closer to what I’d consider a level in line with a bright power on indicator.
The next image is of the parts used for this project, less the wire:
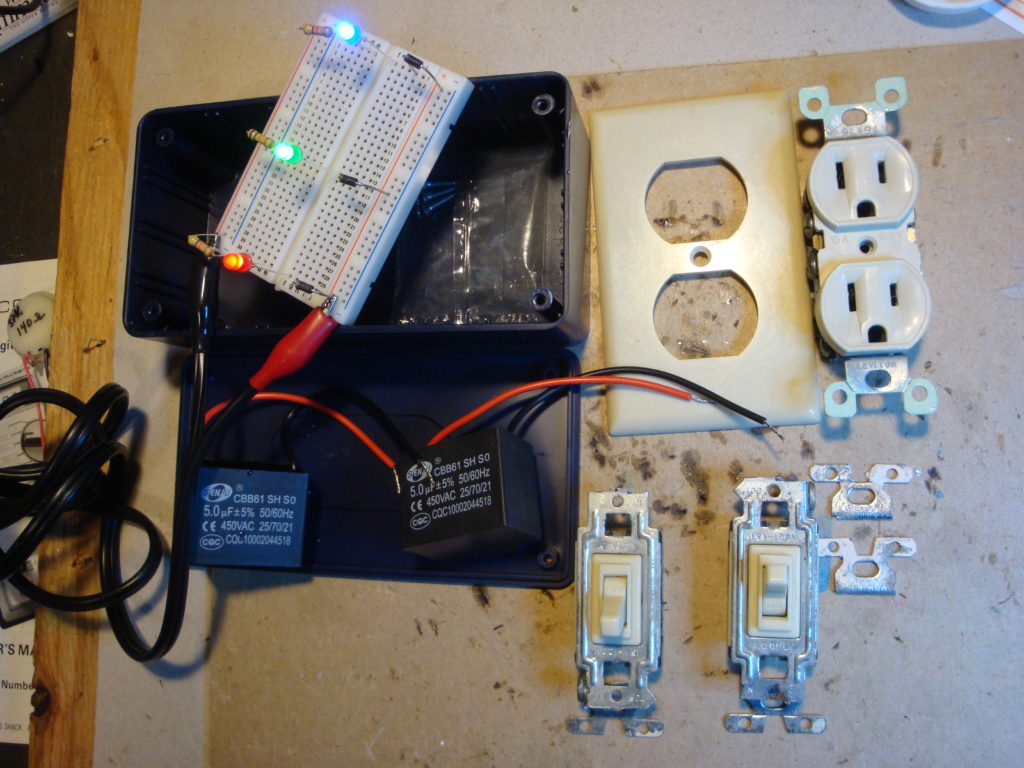
Figure 2: Parts and LEDs Under Test
In Figure 2 above you may notice that I cut off the edges of the switches. I did this because they were causing the switches to extend into the box a bit more than there was space for.
The next image is of the box with both switches mounted and the top cut out for the sockets.
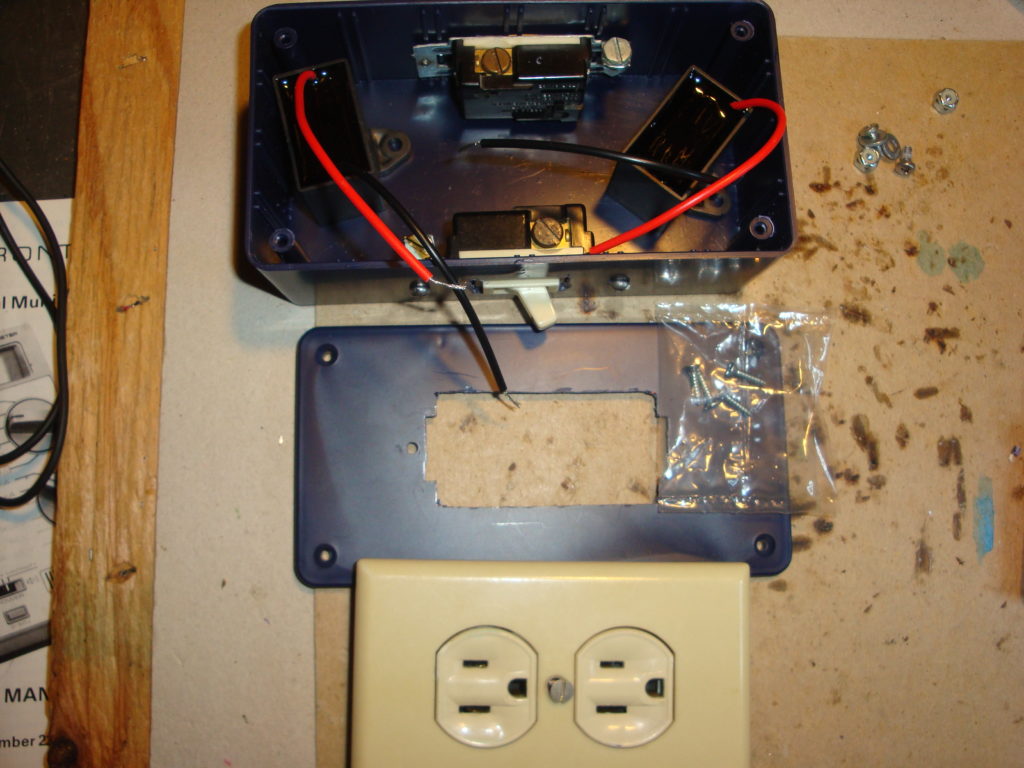
Figure 3: Parts and LEDs Under Test
Next, the AC cord was added and the sockets mounted to the lid of the box. Also, the LEDs are now wired to the protection diodes and the needed resistors:
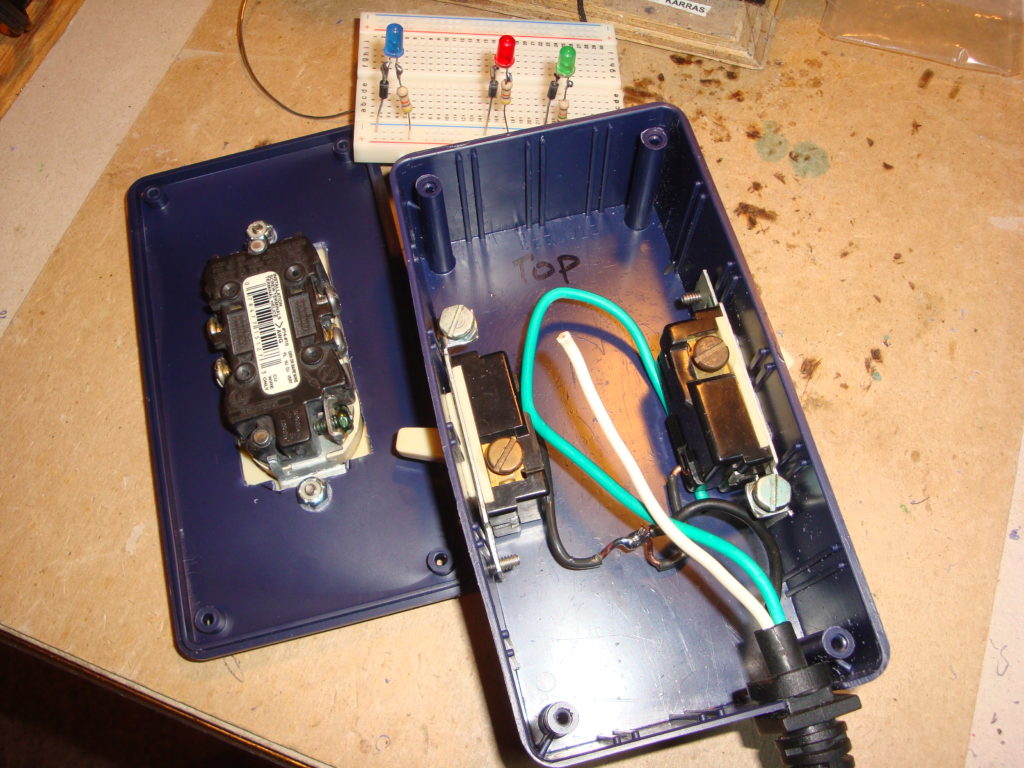
Figure 4: Parts and LEDs Under Test
The next image is with the addition of almost all the wiring. The only parts now missing are the LEDs:
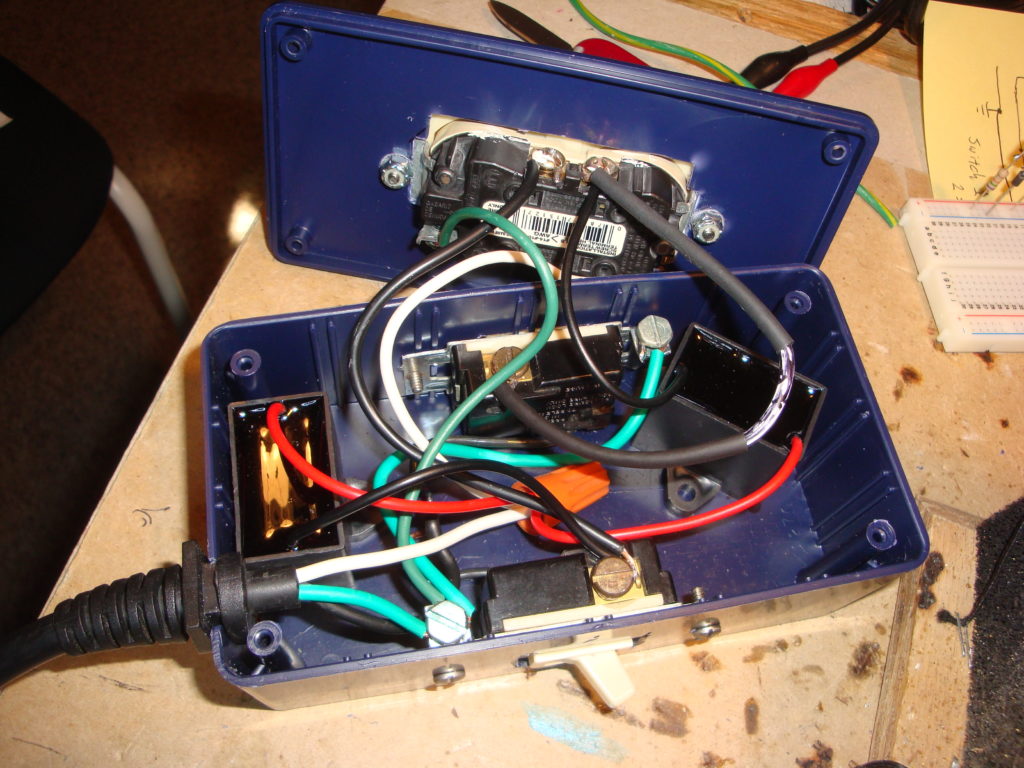
Figure 5: Box wired but without the LEDs
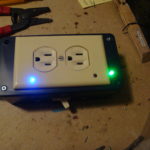
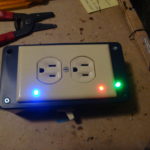
The last three images are of the completed box being tested with no switch turned on, one switch on, and then both switches on:
Figures: Left 6, Center 7, Right 8
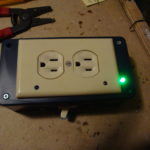
6: Box plugged in, Switches Off
7: Switch 2 On Left Socket Hot
8: Both Switches On Sockets Hot
My Box Under Initial Power Tests
NOTE: When one switch is on it also adds 5 µf of capacitance just like plugging in many of the “power saver” poxes you can buy on-line. When both switches are on it adds a second 5 µF of capacitance for a total capacitance of 10 µF.
When I first decided to wire the switches, I was thinking that they would control only the addition of the 5 µF capacitors, but the more I thought about it, the more I figured I’d only want to test this once or twice. If it could be easily changed into a simple two-socket extension box with each socket controlled by its own switch, it would be a great addition to my extension cords and power strips. With this in mind, the switches, as seen in the schematic, now control the LEDs, and one each of the sockets, as well as one each of the capacitors, which will be easy to remove.
A “Kill-O-Watt” meter was used to measure the power used (Watts), the Volt-Amps (VA), the frequency (Hz) the Power Factor (PF=W/VA), and last, the Amps. If you take a close look at the photo of the parts, you’ll see that the capacitors can clearly be seen to be 5 µF AC at 450 Volts. The receipt also classified them as “Fan” capacitors. So, the first test performed was with a large fan. This fan uses ~100 Watts to run on full speed, so that’s the item used for the first test.
| Box Switch 1 \ 2 on | Fan Only no Box | Switch 1 & Fan On | 2 Switches & Fan On |
| 00 W \ 00 Watts | 102 Watts | 102 W | 102 W |
| 28-35 VA \ 64 VA | 105 Volt-Amps | 102 VA | 107 VA |
| 59.9 Hz \ 59.9 Hz | 59.9 Hz | 59.9 Hz | 59.9 Hz |
| 0.01 PF \ 0.01 PF | 0.95 Power Factor | 0.99 PF | 0.94 PF |
| 0.23 A \ 0.52 A | 0.87 Amps | 0.83 A | 0.87 A |
It can be seen that the first capacitor balances the power factor of the fan running at 102 W to a Volt-Amp (VA) of 102 VA, for a Power Factor of 0.99. There must have been some difference we couldn’t quite see, due to the Kill-O-Watt being accurate to only +/- 1W and 1 VA. Without the box and capacitor, the power factor was 0.95 for the fan.
But look at the Watts – this is what you are billed by the electric company for. The Watts, while the fan was on, was 102 Watts, with the “Power Saver” set at 5 µF, or set for 10uf or no capacitor being used at all. There is NO difference in the amount of electricity used, and so there will be NO savings by using this home-made or any manufactured “Power Saver” box.
Many other folks on the Internet have tested many of the other boxes and have shown that there is no savings using any of these boxes either. Yes, these “power saver” companies are correct: the current (Amps) does go down when using a ”power saver” box, but the Wattage does NOT change. Also, notice these companies do not show how much current their box uses when it is the only thing on the line, meaning it is plugged in but no other device is plugged in or turned on. Their boxes probably also take anything from 0.1 – 0.5 Amps but they don’t tell you that. While the device is plugged into the wall, it’s using 0.1 Amps (or 0.5 Amp for 10uf) so it’s using some electricity all on its own. So, it’s not saving you anything and may actually be costing your more money to use.
In fact, it doesn’t matter because, as I’ve shown, with or without the box, the box on or off, being used or not being used, the REAL Power Used by the device under test, lamp, fan, or whatever, is – the – same!
The Test Set-up:
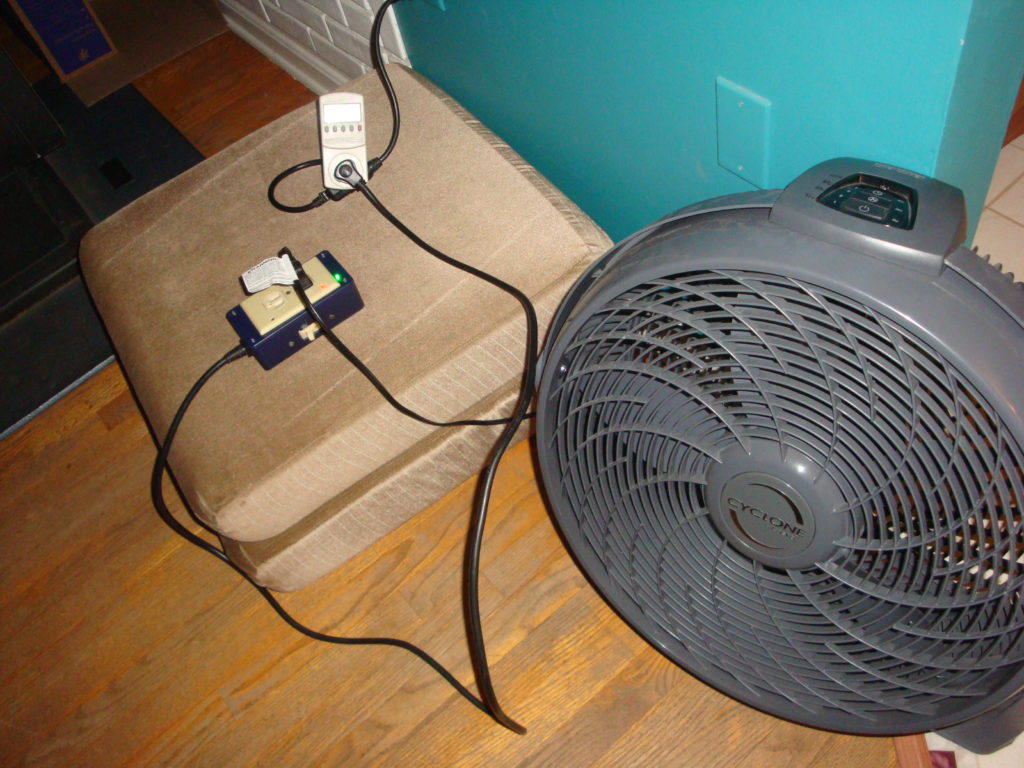
Figure 9: The Kill-O-Watt meter – Phil’s Home-made “Power Saver” box – and the Fan.
—– So, what is “Power Factor”? —–
You can read these two web pages about Power Factor:
What is power factor and why is it important? – May 16, 2019
https://www.fluke.com/en-us/learn/blog/power-quality/power-factor-formula
and
Power factor * From Wikipedia https://en.wikipedia.org/wiki/Power_factor
—— Some Real ways to save on your electric bill —–
HOW TO LOWER YOUR UTILITY BILLS AND SAVE MONEY !!!
and
How To Save Hundreds On Electricity
Prepper Princess
The Myth Busters proved, in one of their shows, that you can save electricity, money, if you turn off your lights when you leave a room even if it’s only for a few seconds.
All my blog articles are listed at: Karras’ Corner
or
Karras’ Corner Article Links at the KE3FL Web Site


I may have found a real use for these boxes. As someone who knows something about electricity and electronic circuits I know that capacitors are for storing energy large caps are used in power suppliers to even out the voltage/current needs of a circuit. I thought perhaps I could use my home made box to do just that for my refrigerator and 1500W microwave oven. I noticed that I usually popped the circuit breaker for that AC line about twice a month, sometimes more, whenever I tried to use the microwave and the fridge was using its compressor. So on November 5th I plugged the box into the same line as the fridge and microwave. After about two months with no problem using it with 10 µf – both of the 5 µf caps – I reduced it to using only one 5 µf cap.I will let you know the results next year if the circuit breaker never pops.
OK, so I forgot to put that in late last year, here’s the update: Yesterday evening 7/5/2021 I tried to use the microwave with the “Power Saver Box” (PSB) still set at 5µf and it popped the circuit breaker for the first time in over a year. So, I switched in the second 5µf cap for a total now of 10µf. Will this save me more trips to the basement breaker box or not? Only time will tell.
New update, even with 10µf the circuit breaker blew once already about two weeks after I upped the capacitance. SO in either case 5 or 10µf will do it’s just not perfect because this is AC and not DC so if the cap is empty it can’t help. This is probably why it still happens but very seldom now as opposed to multiple times a week before I added the 5µf cap.
One could argue that since you actually moving the power factor closer to 1 with these “power saver” boxes, you’re saving the utility company money instead. ;-), since they can spend less on PF correction in their plant. Yes, it would be nearly impossible to quantify the savings, but none of these sellers of power saving boxes can quantify the savings you get either. However, I do want to thank all the purchasers of these contraptions for helping make the power grid more stable.
Mike, One can buy AC capacitors, which is all this box really has in it doing anything, for much less than $1 but most people would not know how to install them anyway. And anyway most large items, like microwave ovens, already have these capacitors installed.