
What a great little box this Magewell Ultra Stream HDMI is. If you’re looking for a one-step way to stream to Facebook or YouTube, it’s going to be a life-saver. Or so they tell me. I did an unboxing that was a little harder than I thought it would be, so I thought I’d go through the setup process as if I were an average person. Is it easier than using a PC or phone? Let’s find out
The equipment I used
I wanted to use stuff I had lying around the lab, nothing special. So here’s what I ended up with:
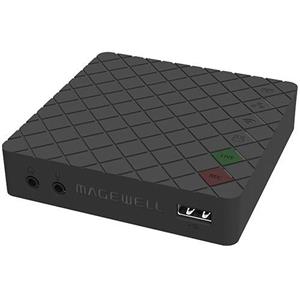
- Magewell Ultra Stream HDMI
- iPhone X (for app control)
- Nikon D3400 still camera (for camera)
- Sandisk 128GB flash drive
The Nikon camera has a microphone and a live view, as well as an HDMI output. It was basically acting like a very expensive webcam.
Step 1: QR code
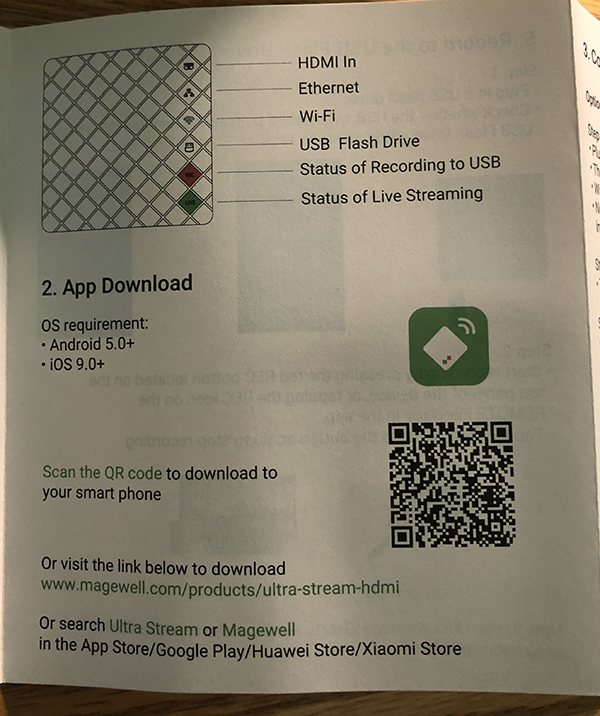
This is a photo of the page in the manual. The iPhone picked up the QR code, but it took me to a page on magewell.com that just kept reloading.
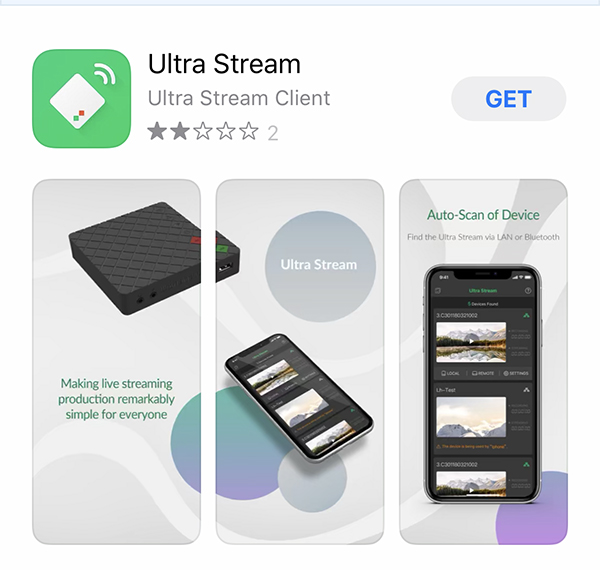
So, I searched for Ultra Stream in the App Store and it was pretty simple to figure out which app to get. And, it was free.
Step 2: Connections
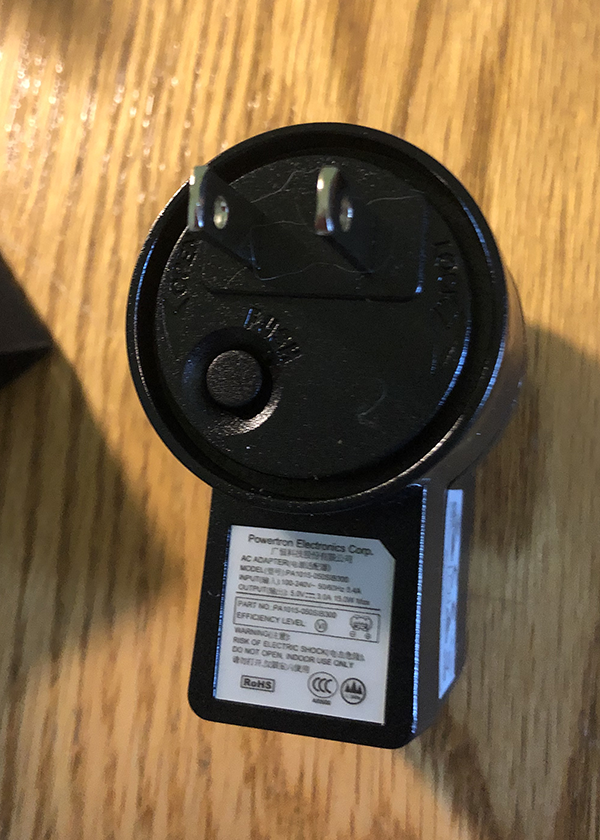
The power adapter is in 2 parts so you can plug it in anywhere in the world. It has a USB connection on the bottom and connects to the Ultra Stream.
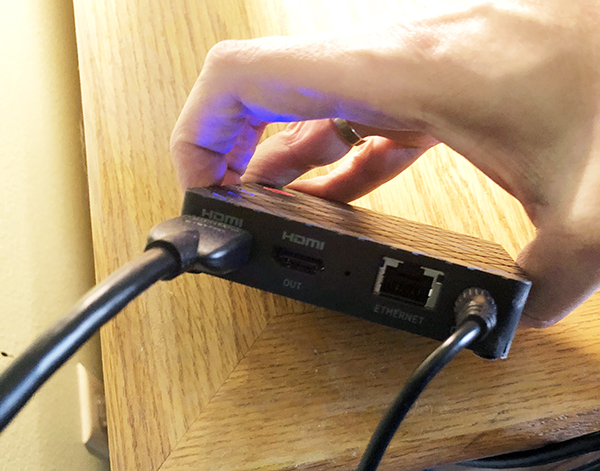
I connected the camera via HDMI cable to the HDMI in.
I connected a flash drive to the USB port on the front.
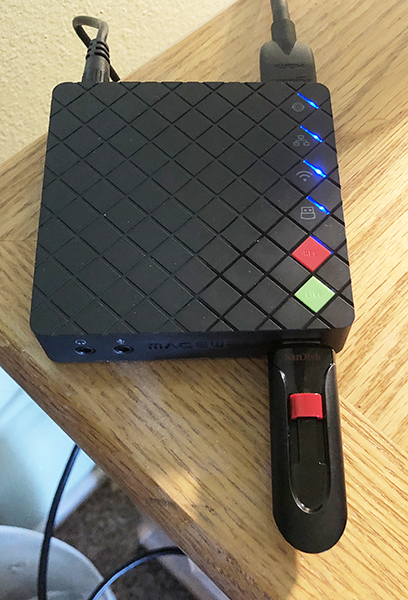
When you plug in it, you get this video sequence.
This repeats several times until it settles into this video sequence.
At that point you know it’s ready to be configured.
Step 3: Network and Streaming config
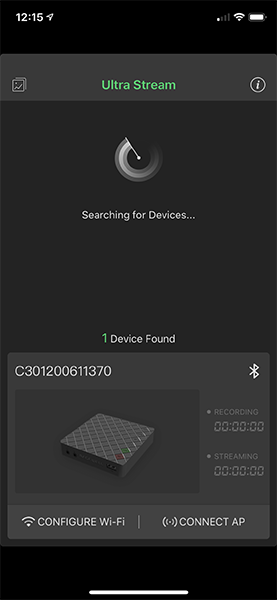
Launching the app tells me the device was found and gives me the option to configure it to accept my Wi-Fi. I could have plugged it in via Ethernet to my router but I figured most people would not do that.

It asked me which network to connect to and my passphrase. It connected easily in about ten seconds.
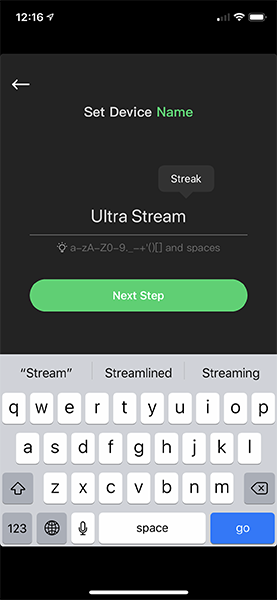
I was given the option of naming the device. For some reason autocorrect started kicking in as you can see above. No big deal though. It then picked up the date and time, as well as the time zone, automatically.
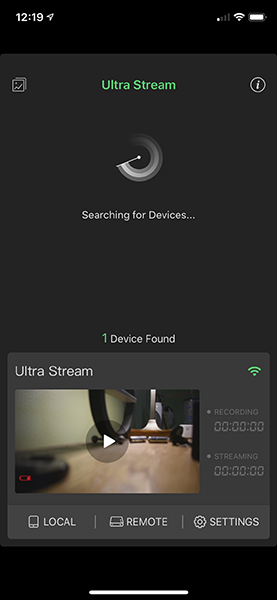
At this point I started getting an image on the screen from the camera. You can push LOCAL to start recording to your device.
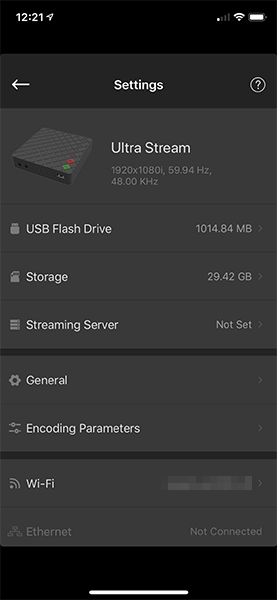
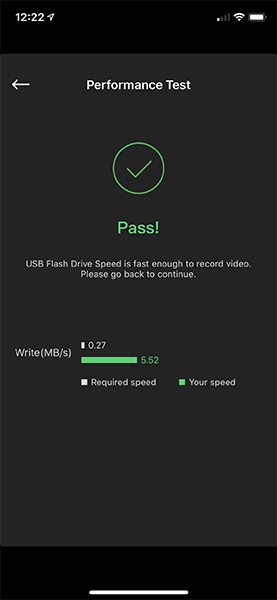
I went into settings to test the USB drive to make sure it was going to be ok. This was a garden variety older SanDisk drive.
Live streaming setup
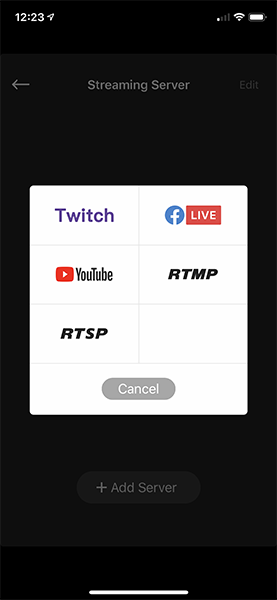
I went into the settings screen and chose Streaming Server, then +Add Server. I chose Facebook Live.
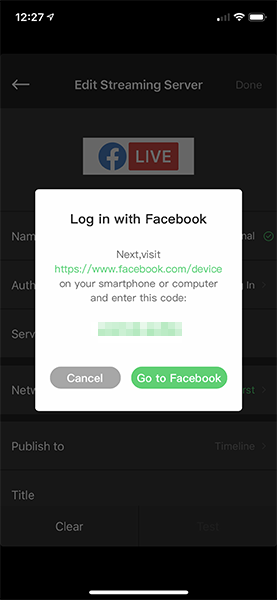
This was as easy as just going to a site and entering a code. No problems.
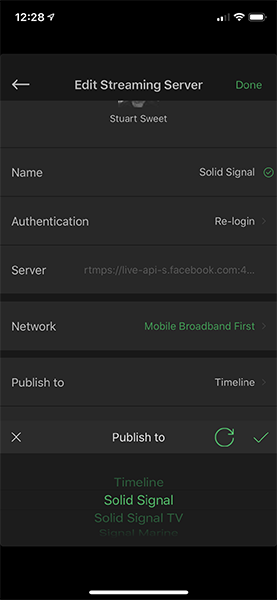
I was able to choose which page I wanted the video to stream to. From there I was all set.
Live Streaming Test
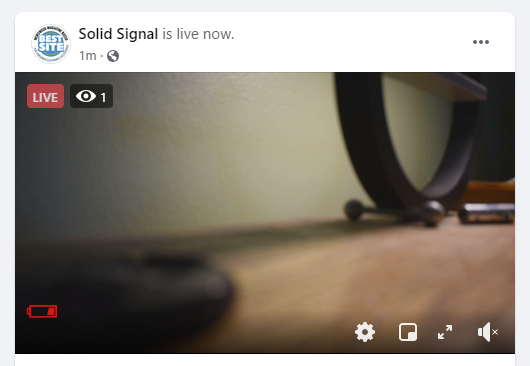
From here, all I did was press the LIVE button on the product. I saw this on Solid Signal’s Facebook Page:
I pressed the LIVE button again to end the broadcast. So it was that easy. There really wasn’t anything to it. It took about 15 minutes to get everything all set up and it was finished. If I wanted to leave this for someone less technical, all they would have to do is turn on the camera and press one button.
That’s what makes this perfect for schools, churches, community centers, or anywhere that less technical people are operating very technical equipment. If you want something like this for your organization, shop for it now at Solid Signal!

Hi. I’m interested in seeing what the web UI looks like, as well as what the RTMP setup looks like as well.
Also curious to know what this device is like streaming to multiple platform. That is what Magewell says it can do.