
This article is out there for a very small number of people with a very specific problem. It’s a little outside the normal realm of this blog, that’s true. However, I had a specific problem, I couldn’t find a good answer for it, and when I finally figured out a workaround, I decided to share it so that other folks could get the solution they needed.
The problem
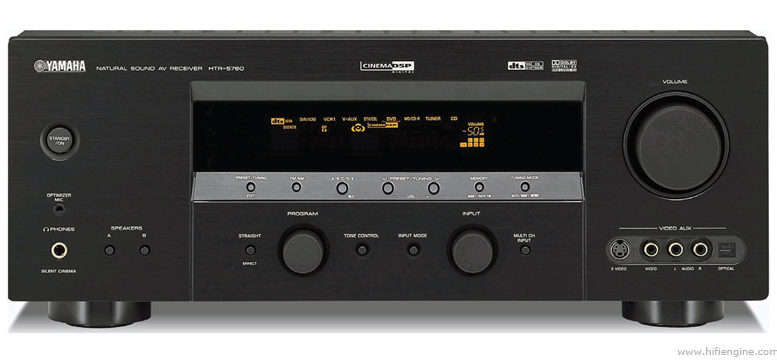
The biggest problem here is that you bought a Yamaha home theater receiver. Now, I’ll be honest with you, I’ve had Yamahas for close to 20 years. Whenever I think of replacing them, I swear I’m going to move to another brand. And then, I don’t. But if you are thinking about a Yamaha home theater receiver, I would look at other brands before making your decision.
Unlike other home theater receivers, Yamaha receivers have at least two different HDMI modes and you have to choose the right one. My receiver, the RX-V4A, has three modes:
- Mode 1, which works with 4KHDR and Dolby Vision.
- Mode 2, which works with 4KSDR and supposedly doesn’t work with HDR or Dolby Vision.
- Mode 3, which works with 8K. I don’t have 8K so I don’t know much about it.
So here’s the thing about the AppleTV 4K. Even when you put it in HDR mode, it sometimes switches back to SDR for just a second when coming out of sleep. This wouldn’t be a problem except that if you have the Yamaha in “Mode 1” then it will sense the SDR and you’ll get a black screen you can’t recover from without rebooting again.
The short term answer is to put it in Mode 2, where it will happily use SDR and it won’t use HDR.
What doesn’t work
I’ve gotten a lot of suggestions from home theater forums and none of them work. Here’s just a short list of what I’ve tried:
- Turning “Standby Through” on and then setting the AppleTV to HDR that way.
- Turning on 4K upscaling.
- Changing to a really expensive high-speed, 8K-compatible HDMI cable.
- Running the output from the AppleTV straight to the TV and then using eARC to push the sound back to the Yamaha (that’s another whole issue, and another whole article.)
- Using a fairly dicey HDMI “stabilizer” thing I got on another site
It took me nearly a year of messing around before I finally got the answer. It doesn’t work 100% of the time but I’d say it works 95% of the time. It doesn’t always “stick” but in general if it stops working you can go through the steps again and it will work again for a while.
Here’s what you do
Right off the bat, I apologize that there are no screen captures. My screen capture rig is on another TV from my AppleTV 4K.
1. Make sure your Yamaha’s firmware is up to date.
This is surprisingly critical. Since most Yamaha receivers can’t be controlled over IP, people don’t bother to connect them to the internet. Connect yours and get the latest firmware. To be very honest, these receivers ship with really buggy firmware and they are just now getting to the point where they are stable.
2. Make sure the Yamaha is using Mode 2 for your AppleTV.
On the Yamaha remote, press SETUP and go to HDMI. Change the HDMI mode for your AppleTV to Mode 2. Note: When you go into this menu, it will always default to changing the settings for HDMI1, regardless of whether or not your AppleTV is on HDMI2, or whatever. Make sure you’re changing the right input.
If your screen goes black, unplug the AppleTV from power and power it back up again.
3. Go into the AppleTV Settings App and confirm video settings.
At this point your AppleTV should be in 4K SDR mode and the color mode should say 4:4:4.
4. Change the color mode to 4:2:2.
Don’t worry, this is temporary. Even though I’m not convinced you could tell the difference, you probably don’t want 4:2:2 permanently. When you select 4:2:2 it will run a test to make sure it works. As long as it works, you can move to step 5.
5. Enable Dolby Vision.
In the video settings, choose “Enable Dolby Vision.” It should actually work even though you’re in Mode 2. It will automatically change the color setting back to 4:4:4 for you as well.
6. Change the resolution BACK to 4K SDR.
Yes really. Trust me on this. If you don’t do this step then you will get a black screen the next time you take the AppleTV out of sleep mode. You need to let the Yamaha keep thinking this is an SDR device.
7. Go into “Match Content” and change it so “Match Dynamic Range” is ON.
This is the magic part. Once you have this set to Match Dynamic Range, then you will get Dolby Vision and HDR for content that uses it. You’ll get SDR for everything else which doesn’t matter because all that content really is SDR. The Yamaha won’t complain that you’re using Dolby Vision or HDR for some reason, and the AppleTV will come out of sleep mode in SDR, so you won’t get black screens.
If you get Dolby Vision but not HDR…
In some cases, depending on what you have tried before, Dolby Vision will work but HDR won’t. In this case, start with Step 3. Then after you enable Dolby Vision in Step 5, Go to Resolution, Other Resolutions, and select 4K HDR. Once the box knows it can do that, then go to Step 6 and you’ll be fine.
Long Term
I tend to think this will be solved long term with a firmware update from Yamaha, but who knows when that will come. In the meantime I have found this solution works for 3-4 weeks and then you’ll notice something that should be in HDR and isn’t. Then you just go back to Step 3, do it all again, and it will work again.


Hi there. I had a system that was working fine last night. Yamaha RX-V6A and AppleTV 4K.
This morning, the receiver started turning itself off every 15-18 minutes, regardless of input (HDMI or analog audio).
Finally, it announced that it needed a firmware update. Updated to 1.63. The receiver now stays on, but will not play content from the AppleTV. It will show the menus from Apple and app developers, but as soon as I try to play content, it goes dark.
BD player and discs work just fine.
Your steps make my problem worse. If I switch the receiver to Mode 2, it won’t get ANY signal from the Apple TV.
Any ideas??
Just temporarily, switch to SDR if you have Dolby vision or hdr enabled. If it works run like that a day or so and try again
That didn’t help. I just heard back from Yamaha tech support. I had to unplug the receiver for 30 seconds and plug it back in. That fixed it. :headsmack:
I think I was experiencing a “dropped HDMI handshake” that was independent of resolution and dynamic range.