
The DIRECTV remotes and receivers are incredibly reliable. There’s good and bad to that. While it’s great that they don’t break, they will sometimes outlast your TV. When that happens, it’s time to reprogram. Don’t worry, it’s very easy to do.
If you have a Genie Remote
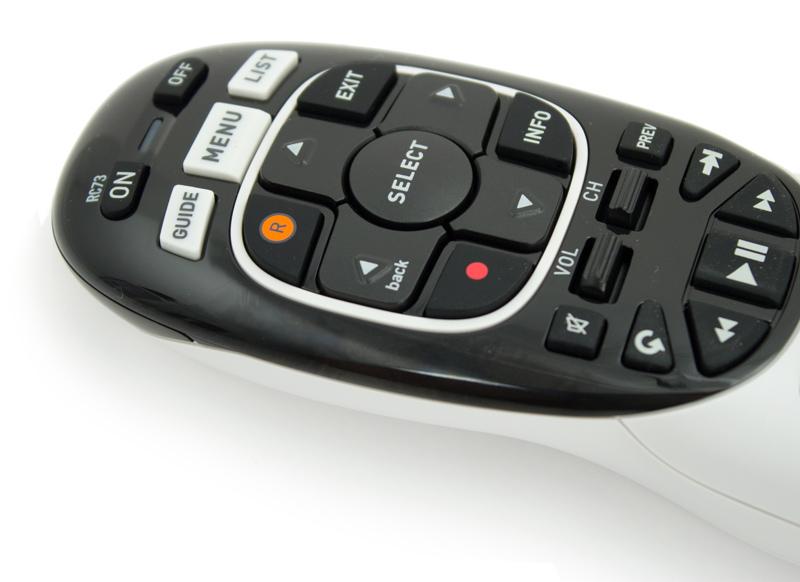
If your remote looks like the one above, you have a Genie system. This is the most modern DIRECTV system and the remote is really great. It will shoot through walls and doors and you don’t really have to aim it.
To reprogram it for your TV, press MENU then go to Settings, then to Remote Control. Then, choose Pair/Program Remote.
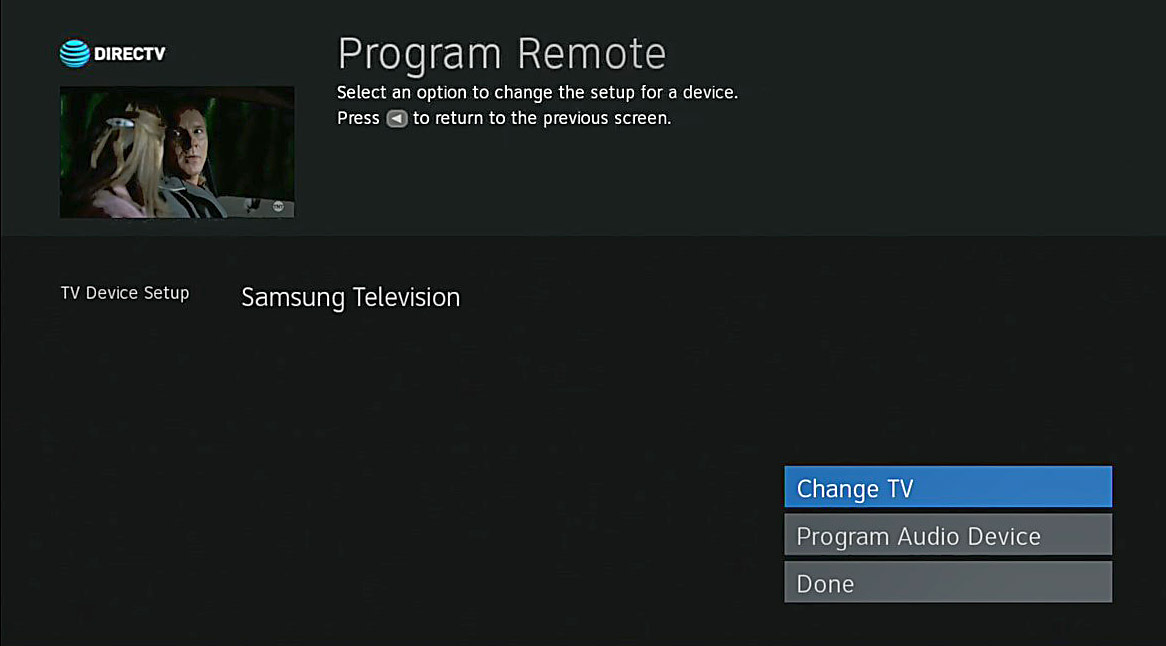
From here it’s very easy. Choose “Change TV.” In some cases the TV will broadcast its model information through the HDMI cable and the remote will program itself. If not, you can can enter in the new TV’s brand and model. If you’ve already lost the owner’s manual, you can choose the brand and say “I don’t know my model” and it will try several different ones until you get the right one.
These remotes are self-programming. All you have to do is wait while the information is sent to them. There are no codes to enter.
Once programmed, the remote will work like it always did, turning the TV on and off and controlling the volume.
If you have an older remote
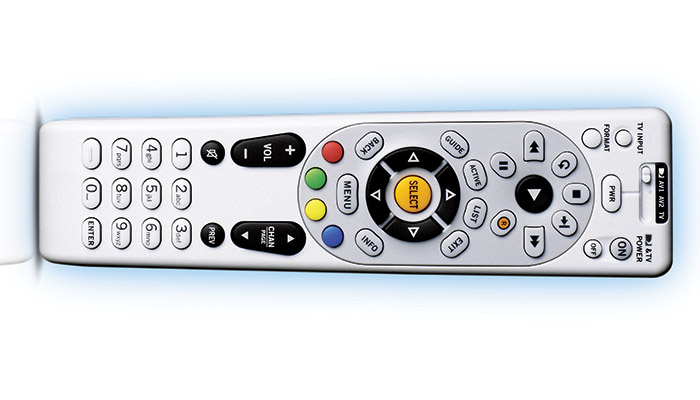
If your remote looks like the one above, the programming method is a little different. The end process is the same, but how you get there is different.
Going through the TV screens
You can press MENU, then go to Settings&Help, then Settings, then Remote Control. Then choose Program Remote.
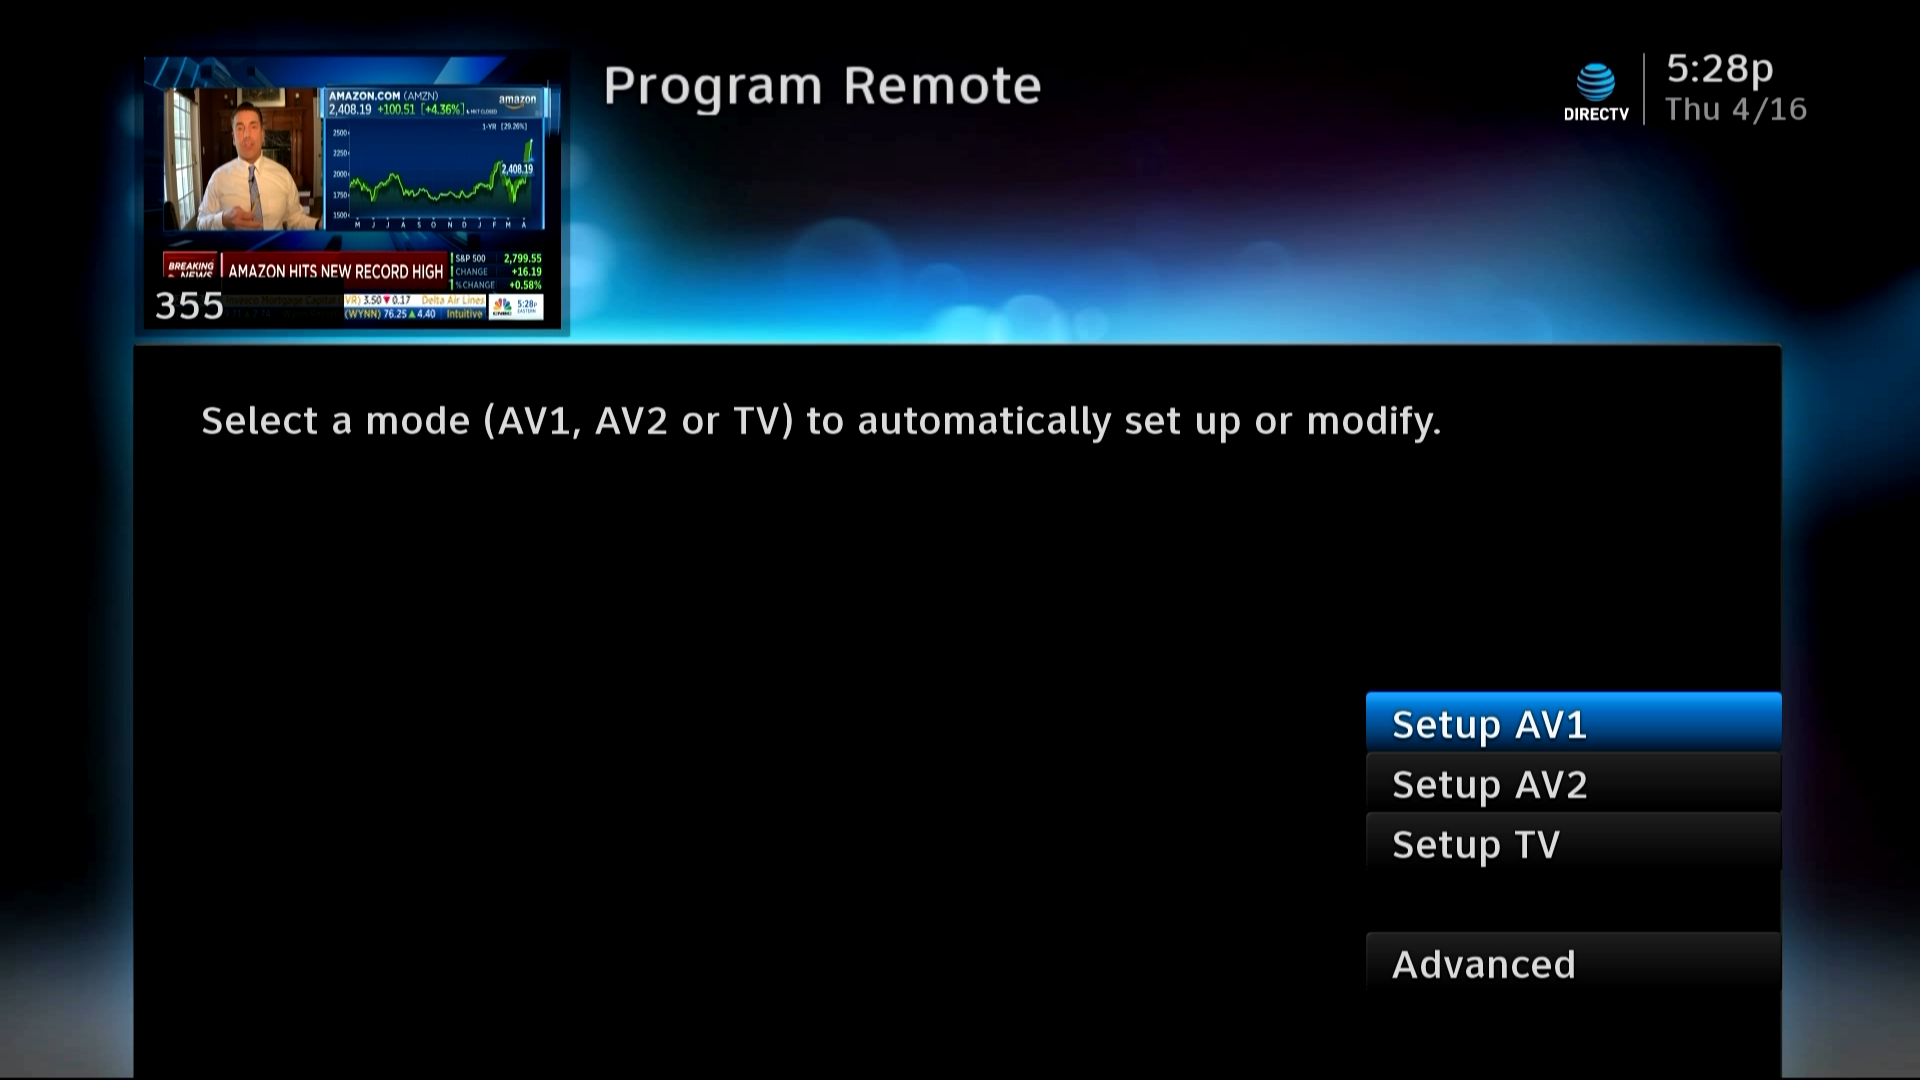
At this point your receiver may ask you to point the remote at the receiver. If this happens, it means your receiver is set up to self-program and that’s a good thing.
Once you enter the brand and model of your remote, your receiver will try to program the remote for you. You’ll be asked to confirm that it works, and when it does, you’re all set.
Doing it manually
You can also program this remote old-school. You can use this tutorial which gives you all the steps, including all the codes you need. Here’s a quick breakdown of how to do it:
First, slide the switch at the top of the remote to TV. Then, press and hold the MUTE and SELECT buttons. You will need to do this
for about 3 seconds, and then you will see the light at the top flash twice.
Using the number keys, try the first 5-digit number on the list. Press slowly and carefully. When you have entered all 5 numbers the light at the top will flash. Now, try making the TV louder using the volume button. If it works, you are done.
If not, try the next 5-digit number on the list.
Doing it manually can sometimes be faster, but it does take a lot of button pushing and it’s bound to make you feel like you’re stuck in the 1990s.
Get the accessories you need at Solid Signal
SolidSignal.com is your source for all the satellite TV accessories you’ll need to live your best digital life. Shop Solid Signal now to get the same parts and accessories the professionals use!


Be the first to comment on "How to reprogram your DIRECTV Remote for a new TV"