
There’s a technology in your DIRECTV receiver that makes everything better. Imagine not worrying about changing inputs on the TV or even bothering to point the remote. It’s time to get rid of those confusing universal remotes and use your DIRECTV equipment the way it was intended. All you need is a little knowledge.
It’s called HDMI Control
The industry calls it HDMI-CEC, but DIRECTV boxes call it HDMI Control. It’s part of the HDMI standard so it’s built into almost all consumer electronics today. It’s probably been there all along and you’ve never realized it.
The point of HDMI Control is to send very basic information to your TV from some other source like a DIRECTV box. For example, power up and go to the right input. This saves you time and effort and makes it possible to put away the old universal remote.
Why people had universal remotes in the first place
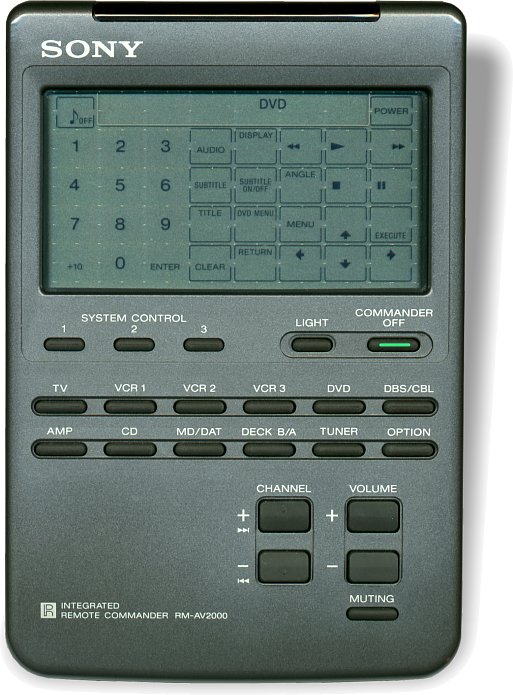
In the bad old days, I had a couple of VHS players, a DVD player, a DVR, a home theater receiver, and a video game all hooked up to the same TV. This would have meant about half a dozen remotes on my coffee table. Let’s say this wasn’t a friendly situation for everyone my house. So I got a universal remote with macro capability. It was this gigantic thing. Believe it or not this was futuristic at one point.
It took me about a day of programming but I was able to get it set up so that if you pressed the “1” button it would turn on the TV, set the receiver to the correct input, turn on the DVR, and show only the buttons that the DVR needed.
This was a great solution except for two things.
Every time I added a component to my home theater it took a day to program.
Yes really. I had to add the codes one by one and then create the macro over and over again to test it and make it work.
You had to aim it carefully.
Like almost all universal remotes, it was infrared-only. DIRECTV boxes have come with RF-capable remotes for over a decade and yet with this system the RF remote stayed in a drawer.
Eventually universal remotes got smarter and smaller, but they never did control things over RF. Some bypassed that technology altogether and interfaced through your home network but those ones were pretty expensive. What I needed was to get back to basics.
The real benefit of HDMI Control
HDMI Control lets you use the remote that your device came with. That may not seem so great but let me explain. My most common two devices are my DIRECTV Genie Client and my AppleTV box. Both actually have really good remotes. The DIRECTV Genie Remote is slick, small, responsive, and smart. It has built-in RF so you can point it anywhere. The AppleTV remote has Bluetooth for communication, a touch surface for navigating, and a microphone for voice search. Overall they are much better than my universal remote. Sure, I’ve moved back to two different remotes but they’re two really good remotes. I still don’t need a remote for the TV because the DIRECTV and AppleTV remotes handle volume control and input. What else do you use on a daily basis?
Enabling HDMI Control
The first thing to do is enable HDMI Control on your TV. Every manufacture calls this something different. For example Samsung calls it AnyNet. The best thing to do is ask your friend Google how to enable HDMI-CEC on your brand of TV and you’ll get some great answers. HDMI Control has to be on with every device you’re going to use.
You’ll also need to enable it on your streaming box and potentially your home theater receiver. Again a quick internet search is going to help you there.
Settings for DIRECTV boxes
It’s likely that HDMI Control is already enabled on your DIRECTV equipment but here’s how you can tell for sure.
Older Equipment
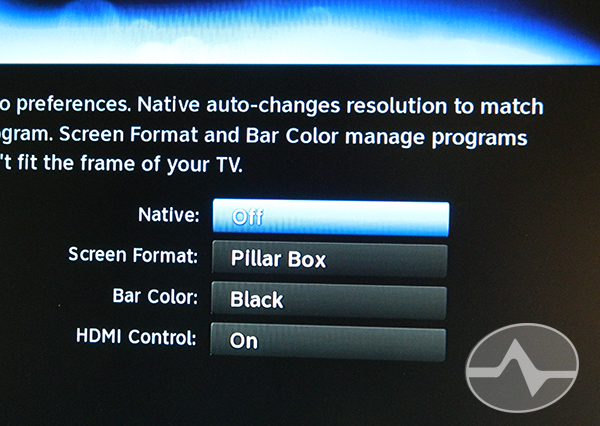
If you’re using pre-Genie equipment, press MENU, then go to Settings&Help, Settings, Display, Video, and you’ll see the screen above. HDMI Control should be set to “ON.”
Genie Equipment
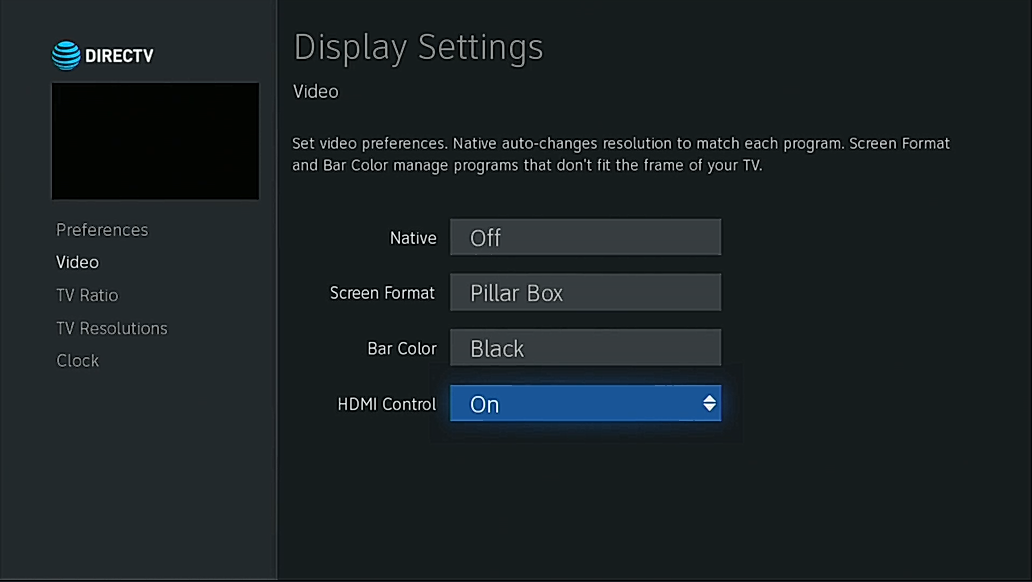
On a Genie, press MENU, then arrow down to Settings, arrow over to Display, and press SELECT. Then arrow down to Video. Again HDMI Control should be set to “ON.”
You’ll want your remote in RF mode
The DIRECTV remote should also be set to RF mode. If you have an older white remote and non-Genie equipment, here’s a full tutorial. If you have a Genie and Genie remote, it’s super easy and you can get the story here.
You’ll also want to make sure your remote is programmed to control the TV. If it’s never been programmed, pressing the VOLUME UP button on the remote will pop up a screen on your TV that will let you go straight where you need to.
Using HDMI Control is one way that you can get a happier household and use the power of the remotes that came with your devices. It’s not for everyone, but it could be an excellent option for you.

Thanks for helping me finally turn this feature OFF! I have a Harmony remote and I do not want my home theater receiver turned on for audio every time I watch TV… yet somehow my DirecTV receiver turned on HDMI control by itself (possibly during an update). I was going nuts trying to figure out why my receiver was turning on every time I turned the TV on… turned all the settings off on the TV, on the receiver, but could never find a setting on the DirecTV box. Until now. And now everything’s back to normal. Thanks!
Has CEC ever worked with the Genie boxes? I ask because I am unable to find any DirecTV information about what it is supposed to do and how the user triggers that action. Does anyone know what button I am supposed to push on the Genie remote? What is supposed to happen when I push it? Where I can find DirecTV documentation on how this feature is used (not installed and configured, but USED)?
Thanks
Yes it does work very well. I use it and have for years.
Thanks for your reply, but it doesn’t address my problem.
1) What button do you push on the Genie remote to trigger the CEC input switch?
2) What happens when you push that button?
Thanks
CEC Input is triggered when you press the ON button on the remote. When you press ON, the client turns on, the TV turns on, and the TV switches inputs.
Thanks. I now know that CEC does not work for my equipment. The “ON” button on the Genie remote does not affect the HDMI input. At least now I know that it does not do what it should do. I was not able to find any other description of that.
The Amazon Fire TV behaves differently. The “Home” button switches the HDMI input to the Fire TV at all times.
I was hoping to read that the newer Genie receivers do more than just pass the signal when “On” is pressed. It should be that other buttons like giude, list, play, etc. also pass a signal to change the input. I want my audio receiver to be the central switch for HDMI equipment, but with DirecTV, I have to then turn the DirecTV receiver off and back on to get it to switch over. That is pretty silly, and half-baked if you ask me.