
Future cord-cutters need to learn to mount and tune their TV antennas. Solid Signal makes this process easy.
Cord-cutting can be 100 percent do-it-yourself, aka DIY. That is one of its biggest appeals. One of its most popular DIY aspects is mounting and aiming your TV antenna. This process isn’t difficult if you follow the basic steps featured in this Cord Cutting 101 tutorial. Follow along and you’ll save some money. More importantly, you’ll be watching free local TV in a couple hours!
Step 1: Choosing Your Spot
To get the best reception, mount your antenna somewhere high and without obstructions. Generally, we recommend placing your antenna atop your roof. If your homeowners association doesn’t allow this, you can try putting the antenna atop your garage. You also can aim it out the window of an upstairs room. No matter how you mount it, make sure there are no buildings, trees, or other obstructions between the antenna and where you aim it.
Step 2: Attaching the Mount
The mount is basically the anchor that holds your mast and antenna in place. Attaching this hardware usually requires drilling a couple of holes and sinking a few screws. While that might sound easy-peasy, there are some things you need to know when placing your antenna mount:
-
If your mount requires drilling, check before you install the screws and mounts.
-
Once you attach the mount, double-check it to make sure it’s securely attached. If it is, then you can attach the mast and the antenna.
-
If you’re mounting on a rooftop, make sure you have everything you need. This might include pitch pads, additional weatherproofing, and replacement shingles. (Planning ahead saves a lot of headaches!)
Step 3: Aiming the Antenna
Most TV antennas are unidirectional. This means these units must be pointed directly at broadcast towers to receive signal. It’s important to know where the towers are in your area. (The FCC’s antenna direction map can be a big help.) Once you have the general location, point the part of your antenna that receives signal in that direction. If you’re wondering which end is “active,” consult the instructions.
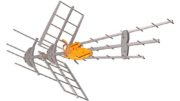
Note: A few antennas have arrows pointing in the right direction. If you are using an old-style “Yagi” type antenna, point the narrow end toward the towers. If you are using a more modern antenna with a reflector made of mesh or of horizontal bars, that goes furthest away from the towers.
Step 4: Fine-Tuning
So, you have your antenna mount secured and your antenna pointed at the broadcast towers. That great, but you’re not done yet. Now it’s time to lock your antenna’s beamwidth onto the actual signal. To help pinpoint the broadcast, we recommend using a Psiber SignalScout. This device locates and pinpoints TV signal at its strongest source, allowing you to fine-tune your TV antenna. Once signal is established, you aim your antenna then tighten the bolts on the mount and mast. This locks it all into place.
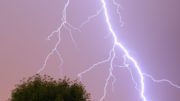
Step 5: Grounding Your TV Antenna
This is the most important step and the one that some experts forget. If you don’t properly ground your antenna, it could turn into a huge fire hazard. Despite the dangers, many people ignore this step because their TV will work just fine without it. Don’t be that person! Remember to ground both the antenna and the mast, and you’ll need to consult city hall or a local electrician to see if your local ordinances are stricter than national ones. Don’t skip this!
Step 6: Channel Scan
When TV went digital, it changed the way stations and channel numbers are listed. For example, what you’ve always known as channel 4 might now be on channel 36. The station also might have several sub-stations. To help cord-cutters figure it out, the Federal Communications Commission came up with the Program and System Information Protocol, or PSIP.
The process of loading PSIP data into your TV is called a “channel scan.” This process is different for every TV; but generally, they start by pressing the MENU button on your remote and going into your TV’s setup screens. Look for something like “Off-Air Setup” or “Search for Channels.” If you’re prompted to choose “Cable” or “Air,” make sure you choose “Air.” The channel scan usually takes about 10 minutes to complete. It doesn’t need to be done again unless you move or your local channels change.
Good Luck with Your TV Antenna!
Once you’ve purchased your TV antenna and receiver, just use this tutorial to start enjoying all that free HDTV. If you’re considering cutting the cord and want to know more, you always can read other articles on The Solid Signal Blog. If you have any questions, feel free to call us at [email protected]. Or you can fill out the form below. Either way, we’ll tell you everything you want to know about cord-cutting!

Be the first to comment on "Cord Cutting 101: Mounting and Tuning a TV Antenna"