
Looking for instructions for an older DIRECTV receiver? Check them out here.
If you still watch a lot of standard-definition channels, you’ll be happy to know that there are some very powerful features built into your DIRECTV Genie system. You have ultimate power to make the picture fill the screen just the way you like.
You have the power to change the output resolution and format of the standard definition channels you watch. HD channels come in just as the broadcaster sends them, unless you’re using an older tube television. There are two different things you can change:
Resolution
Generally this number is set as high as possible, usually to 1080i. This is the highest resolution that normal HDTVs can output. If you have a 4K TV, HD channels should be output at 1080i and 4K channels will obviously be output at… 4K. That’s the theory anyway.
If you have a low-end television like some of the $100-$200 models from TCL, Visio, and others, it may natively be designed to show 720p. In that case you would set the resolution to match.
Traditional Genie clients will output HD if they get an HD signal and, if they are 4K capable, they will output 4K on 4K channels. The new Gemini will output 4K all the time if it’s connected to a 4K television.
Format
This is the way you stretch the screen if you want. You have the following options:
Original format: This is the option to pick if you have a high-end TV that has advanced options for scaling. It passes along the signal in its 100% pristine state. This works most of the time but sometimes things are set wrong at the broadcast end and so the picture could be scaled wrong at your TV. Use at your discretion.
Pillar Box: This option puts bars at the left and right of the image. You can control the bar color by going deep into the display options (MENU, Settings, Video, Bar Color). If you are on an SDTV that’s set up properly, this option is called “Letter Box” and puts bars at the top and bottom of the image.
Stretch: Tired of seeing those bars? Use Stretch to fit the image to your screen. Some people would rather have a stretched image… and that’s cool.
Crop: This fills the screen and keeps the image from getting stretched by enlarging the center of the screen.
If you’d like to get a more visual guide, check out this tutorial.
How to do it

The easiest way is to simply press the INFO button on your remote and arrow over to “Audio and Video.” Press SELECT and you’ll see the image above. Press SELECT again and you can cycle through every available combination of resolution and format.
Often times, though, you don’t want to set the resolution, just the format. There’s a simple way of doing that, but it takes a deep dive into the menus.
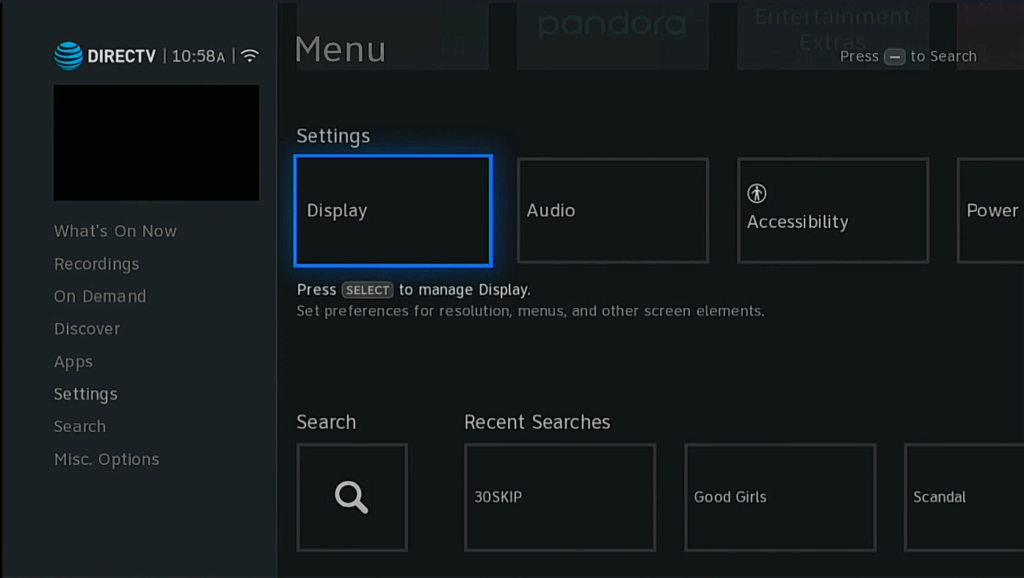
Press the MENU button and arrow down until you’ve highlighted “Settings.”
Then, arrow over to “Display” and press SELECT.
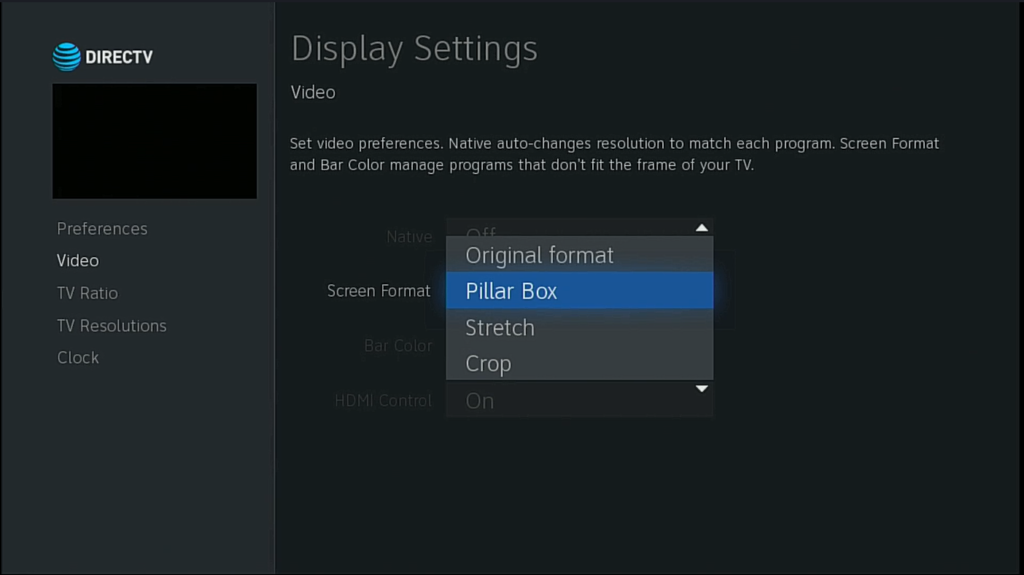
Here, you can change the screen format by arrowing down to “Video” and pressing SELECT. Screen format is the second option down. (The third option is Bar Color, in case you want to change that at the same time.)
This option seems like a lot more work but it doesn’t let you accidentally change the resolution. If you accidentally change the resolution, you’ll have to change it back and that can take a lot of cycling through different options.
Want to know more?
If you have questions, or if you’re considering upgrading your DIRECTV system, call the experts! We have real, qualified technicians available to talk to you over the phone. Email us at [email protected] during East Coast business hours. If it’s after hours, no problem! Fill out the form below. We’ll get right back to you!


Be the first to comment on "How do I stretch the content to fit the screen? (DIRECTV Genie)"