
Old TV show, new TV. What do you do? There are options, at least if you have a DIRECTV HD receiver. You can watch your TV your way, and we’re here to help you choose from the many selections. You might have already checked out this tutorial for Genies or this one for older receivers, but the one thing that’s missing is a description of that these things actually look like. Here’s the tutorial you’ve been looking for.
What the screen formats mean
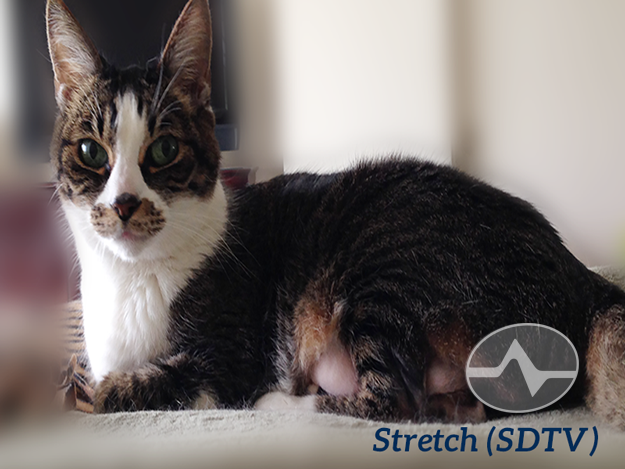
Here’s a handy guide to help you visualize what these look like. Apologies in advance if you’re a dog person.
The choices you’ll get on today’s TVs
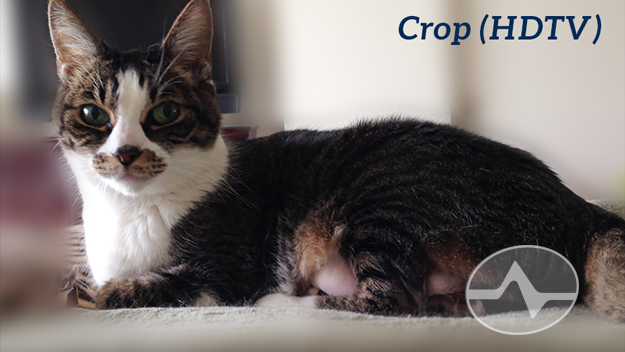
Crop cuts off the top and bottom of an SD picture. This is probably the worst picture quality but it fills the screen and everything looks right.
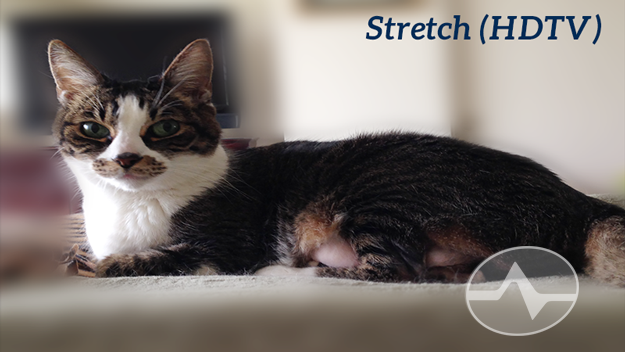
Stretch widens the SD picture to fit the HD screen. A lot of people like this option, although HD purists really don’t.
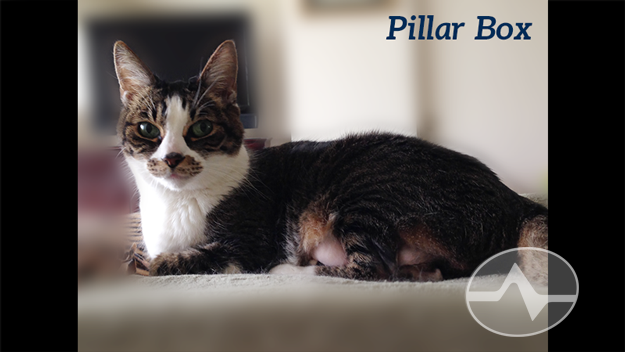
Pillar Box puts bars at the left and right of the screen so you see the whole picture, but it doesn’t fill the screen.

Original Format sends the picture to your TV without making changes to it, so if your TV has a special mode like “Just” you let the TV do the work.
The choices you’ll get on an older tube TV
Most people don’t know that the format settings work differently on SD TVs than they do on HD TVs. That’s why it’s important to set the TV Ratio (in the same display menu.) Here’s what you’ll see on an older TV:
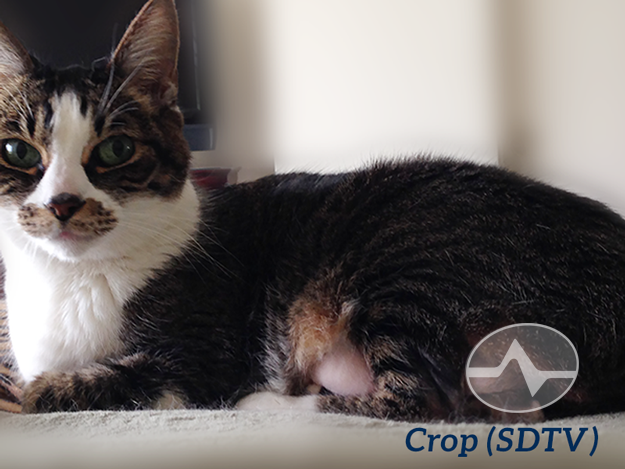
On an SD TV, Crop cuts off the left and right of the image.
Stretch works differently on an SD TV. Instead of making the picture really wide, it makes it really thin.
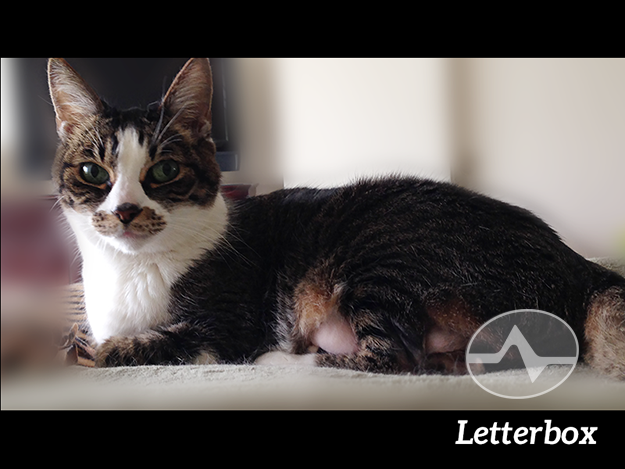
SD TVs give you Letterbox as an option instead of Pillar Box, so you get black bars at the top and bottom.
A quick guide to changing screen formats
There are two ways to change the screen format. This option works on both Genies and non-Genies. I’ve included a screen capture for Genies but it’s almost identical on all HD receivers and DVRs.
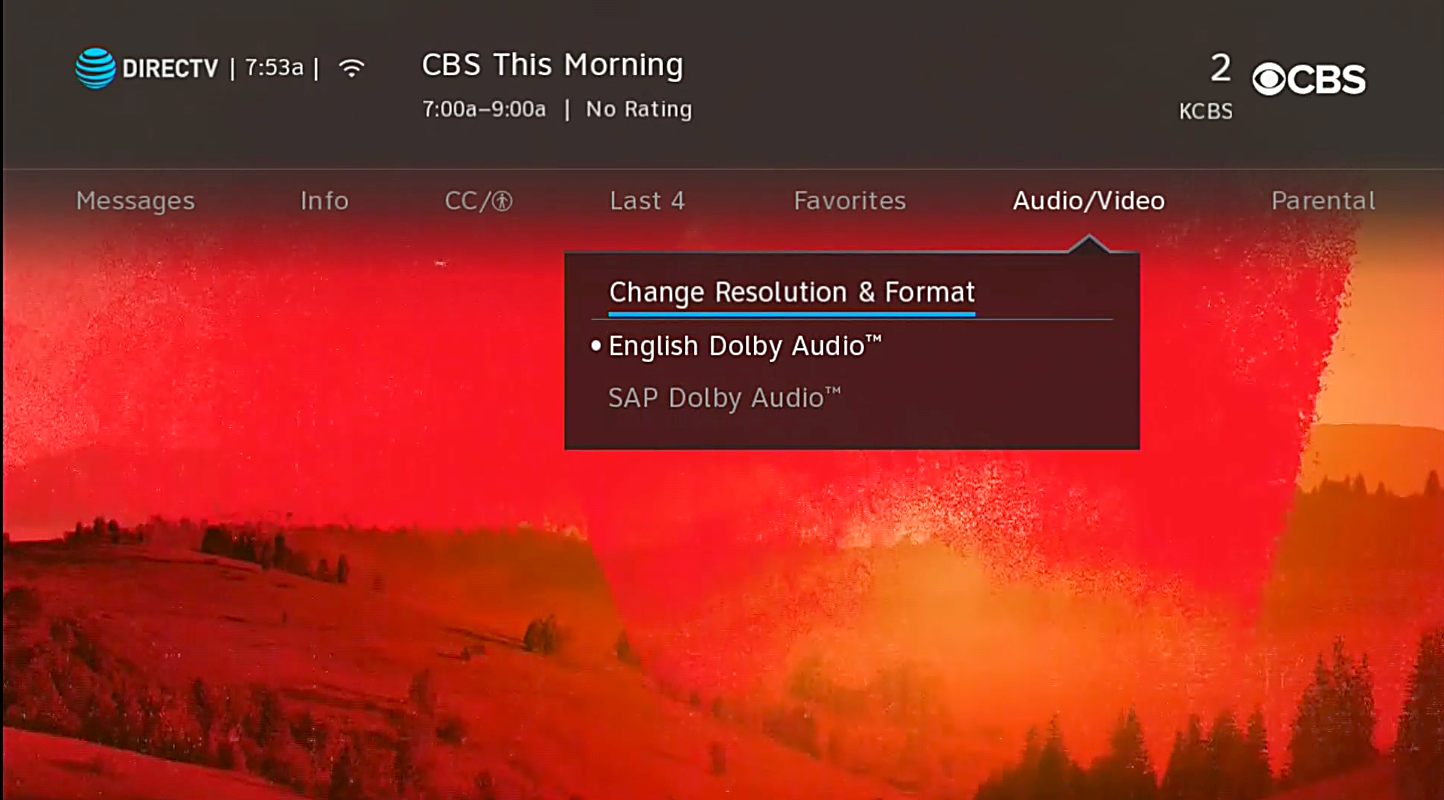
- Press INFO.
- Arrow right to Audio/Video. Make sure “Change Resolution and Format” is highlighted.
- Press SELECT over and over again.
This takes you through every possible choice of resolution and format but it can take a while.
A better way to do it (Genies)
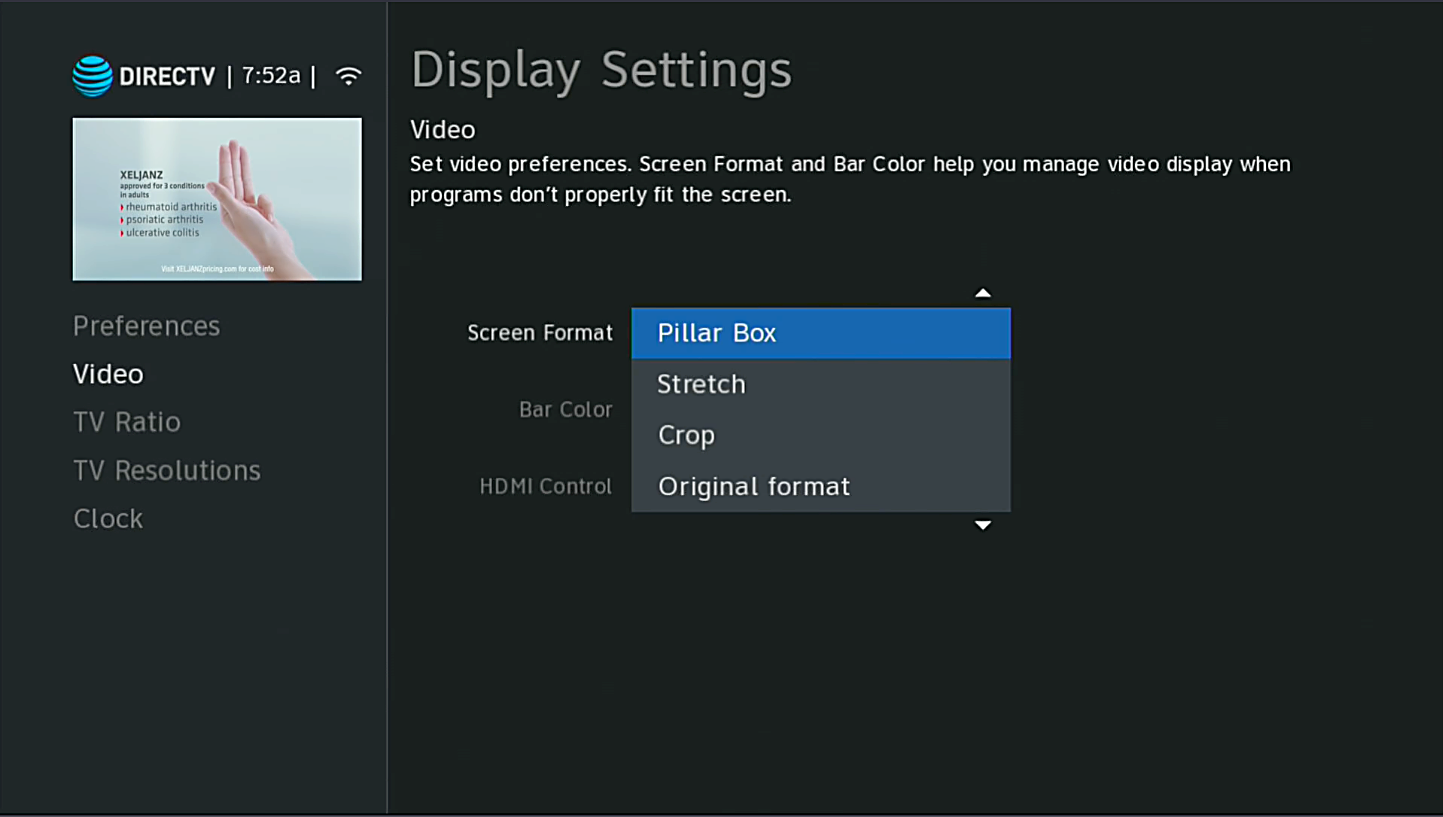
- Press MENU.
- Arrow down to”Settings.”
- Arrow over to “Display.”
- Press SELECT.
- Arrow down to Video.
- Arrow over and make sure “Screen Format” is highlighted.
- Press SELECT.
- Arrow down to your choice and press SELECT.
- Press EXIT to return to live TV.
This seems like a lot more steps but you’ll end up going through it a lot faster.
A better way to do it (non-Genies)

- Press MENU.
- Arrow down “Settings & Help.”
- Arrow over to “Settings.”
- Press SELECT.
- Arrow over to “Display,”
- Press SELECT.
- Arrow down to “Video.”
- Arrow over and make sure “Screen Format” is highlighted.
- Press SELECT.
- Arrow down to your choice and press SELECT.
- Press EXIT to return to live TV.
Again, this seems like a lot of steps but it’s still faster than pressing the SELECT button over and over again from live TV and waiting for your TV to catch up.
Something to note
These steps only work if you’re watching a truly standard-definition channel on a regular TV, or watching an HD channel on an older TV. If the program you’re watching is on an HD or 4K channel, but it’s an older program, these steps won’t work. Some TVs will let you make these same adjustments within their menus. Check with their support forums for more information.
Which to choose?
That’s totally up to you. Remember, it’s your TV and you should choose the one that looks best to you! In the meantime, if you need DIRECTV accessories or upgrades, check out the great selection you’ll find at Solid Signal!
Be the first to comment on "UPDATED: What those display formats mean on DIRECTV menus"