

Planning to cut the cord? Use this TV antenna installation guide to enjoy all the free TV in your media market!
Each day, many people buy a TV antenna so they can cut the cord on cable TV. Those who do save hundreds of dollars every year by watching free TV from their local stations. Other people give up on becoming cord-cutters once they realize they have to install their TV antenna. This is a shame because installing a TV antenna isn’t that hard when you have the right help. Let Solid Signal make things as painless as possible with this easy-to-follow to TV antenna installation guide.
To get the most TV channels in your local area, the type of antenna, and where you install it are the most important factors. For best reception, it’s best to install an antenna at the highest point on your roof. What if your roof is metal and a mount cannot be screwed into it? Don’t worry. There’s usually an option for almost every circumstance or situation. Below, we cover the majority of situations our customers experience when they install an antenna, and the preferred installation techniques used by most self-installers.
We sell more than one hundred antennas and these devices come in many shapes and sizes. We’ll assume that you’ve chosen the proper antenna for your area. If you still need help with your antenna purchase, call us at [email protected] or fill out our antenna help form. Our antenna experts will match you with the right TV antenna based upon where you live and your distance from the local TV transmitters. Once you do that, return to this page for your installation guide.
Step 1: Assembling Your Antenna
When installing an antenna, most people open up the box and put it together. The antenna should come with instructions for assembly; but if it did not, give us a call and we’ll email you the instruction manual. It’s best to choose a day when the weather is nice because, due to the size of many antennas, you’ll need to assemble them outside. If the antenna is too big for you to assemble, climb up onto your roof to assemble it there. Now that your new antenna is assembled, let’s walk through a typical setup.
Step 2: Installing the Roof Mount
How to install the roof mount depends upon which type of TV antenna you bought. Here is a list of the different types of roof mounts along with a description and general instructions for installing each one.
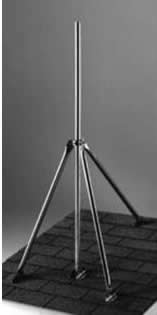
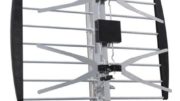
Tripod and Mast: This mount is our most popular recommendation for roof installs. These two mounting supplies are used in combination to install the antenna on the peak of your roof. Place the tripod on the peak of your roof then screw in the leg bolts as shown in the figure below:
Pitch pad seals should be installed under the tripod legs.
Once the tripod is securely fastened to your roof, insert the mast into the top of the tripod until it reaches the bottom mast-holder bracket. Tighten the screws until the mast is secure. You are now ready to hook the antenna to the mast using the U-bolts that came with the antenna.
Types of mounts
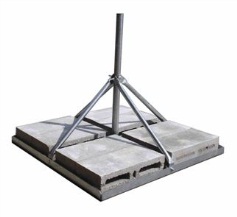
Non-Penetrating Roof Mount: This is the mounting recommendation to use if you want to install an antenna upon a flat roof and don’t want to have to drill. This type of mount is secured by concrete blocks. Simply place the frame of the mount atop the roof, secure it with four to eight concrete blocks, then insert the mast into the base. Now you’re ready for the antenna.
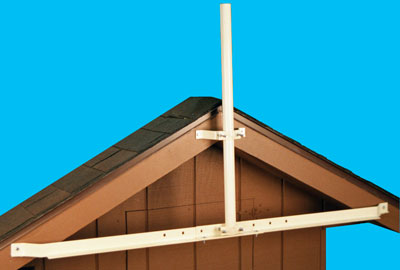
Chimney Mount and Mast: If you want to attach your antenna to your chimney, an 18-foot chimney mount with adjustable straps is the way to go. Installing this mount might be a little easier with a second person to help. Have someone hold one end of the strap while you walk around to fasten it to the Y-mount bracket provided, then pull tight. Once both straps are secured, add the mast to the Y-bracket.
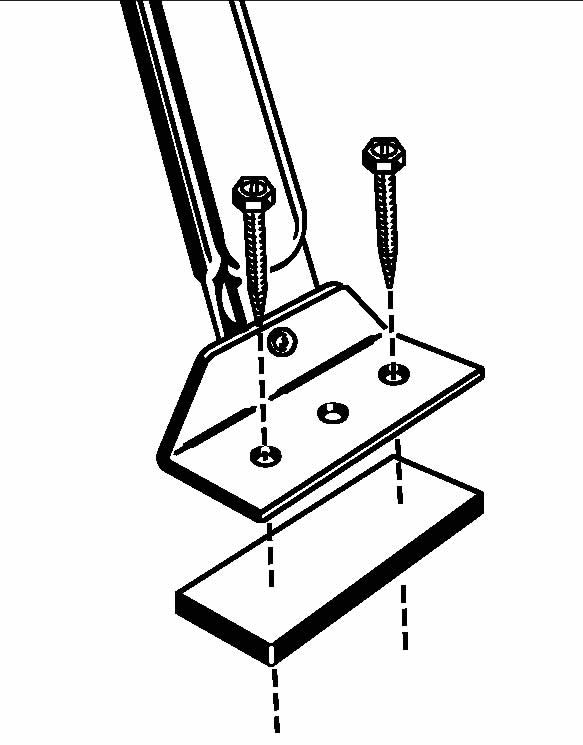
Eave Mount and Mast: The eave mount might be the choice for customers who don’t want to put holes in their roof. To install this, simply screw the two brackets into the eave (as shown below) then insert and fasten the mast.
J-Mount: This option allows you to install an antenna on the side of your home. It’s not recommend for larger antennas. Also, if your local stations are on the other side of the house than the J-mount is installed, this might cause signal degradation. This style J-mount can be used with smaller antennas and allows you to install your antenna onto the roof. A J-mount installation is very simple to install. All you have to do is attach the two screws to your roof or the side of your home. A typical J-mount consists of the pieces shown below:
Special purpose mounts
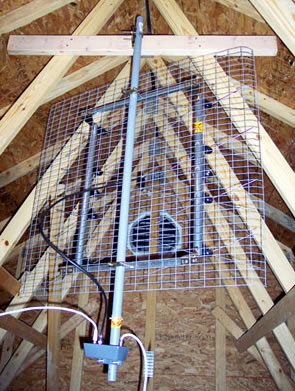
Attic Mount and Mast: This is an option for you if you homeowners association tells you that you can’t install an antenna atop your roof. Simply screw the attic mount into the floor of your attic or one of the floor studs, then insert the mast and fasten. If unable to mount anything to the floor, you can find custom ways to install an antenna in your attic, much like the pictures shown below.
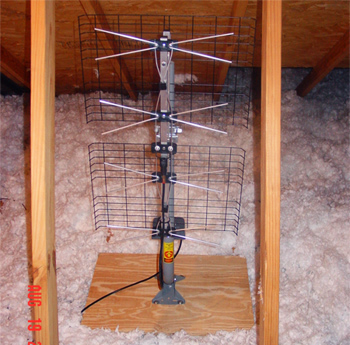
This photo of an attic installation was provided by one of our customers.
Wall Mount and Mast: This is another option for a wall mount; but just like a J-mount, it’s not recommended for oversized antennas. Simply screw the two Y-brackets to the wall, then insert and fasten the mast, as seen below:
Tree Mount and Mast: Although this isn’t our first choice, sometimes a tree mount is the only option a customer has. To install, simply screw the mount into the tree, insert the mast, then fasten, as shown below:
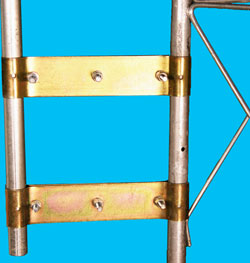
Tower Side Mount and Mast: If you already have an existing tower and/or antenna mast and you want to add another antenna, this will work for you. Simply add on as many brackets as you want to the existing tower then fasten the mast, as shown below:
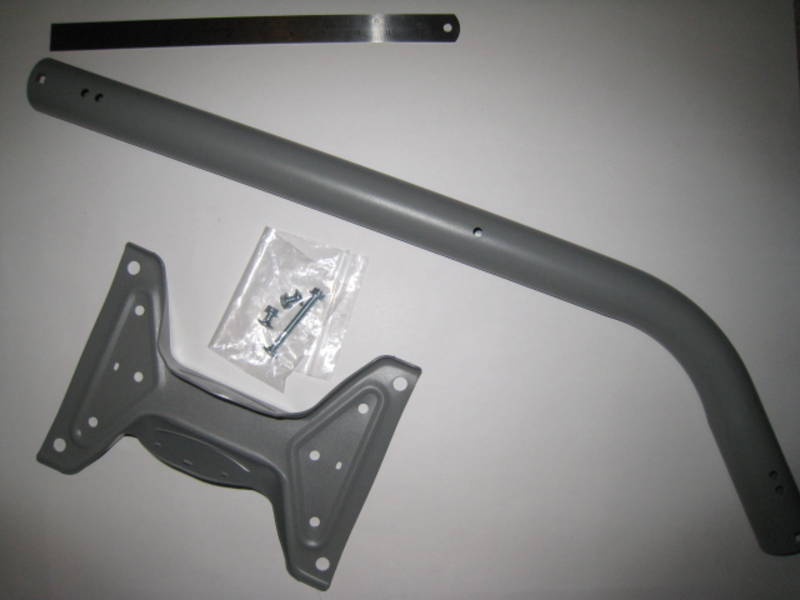
Extra Large 10-Foot Mast Tripod: Here’s an option for those customers trying to add some extra height to their installation. It’s not recommended for oversized antennas. Simply secure the adjustable legs into the roof with the screws provided, as shown below:
Step 3: Hooking Up the Rotator
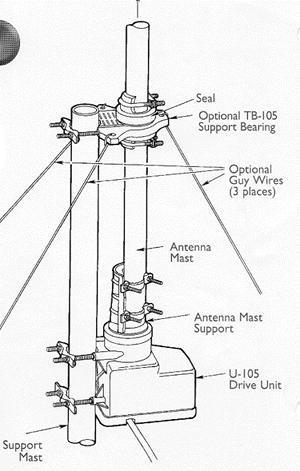
If you purchased a rotor so you can turn your antenna, you’ll want to install it at this point. (You should now have your mount installed atop your roof.) Mounting it to your mast will look similar to the diagram below. After mounting it to the mast then securing the antenna in the rotor, you’ll need to attach the rotor power cable to the bottom of the rotor then run the cable into the home. Here, you’ll attach the other end to the rotor control box. The rotor comes with its own set-up instructions, which will help you through this process.
Step 4: Connecting the Pre-Amplifier Base and the Coaxial Cable
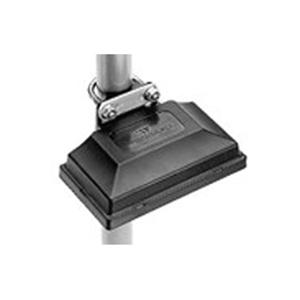
If you purchased a pre-amplifier, you want to install it on your mast with the U-bolt provided, as shown in the picture below:
Most antennas come ready for a coaxial cable to be attached or with a transformer to attach to the antenna. This allows you to screw a coaxial cable onto it. A transformer will usually look like the item listed below:
![]()
Screw a coaxial cable from the antenna to the pre-amplifier, than another cable from the out-port of the pre-amplifier to the home, much like the diagram shown below:
All amplifiers come with instructions to help guide you through the majority of the set-up. If you did not purchase a pre-amplifier, than skip that step and run a coaxial cable from the antenna to your house. If you’re not sure what type of cable you need for an antenna, click here to check it out and/or purchase. The cable can be fastened and neatly hidden as you run it down the side of your home with cable clips and cable tubing.
If you already have existing cable coming from your satellite or cable company, you might be able to utilize it. This is RG6 coaxial cable, the same type of cable that’s used with an off-air antenna. In order to get the cable into your home through the wall, either use your existing cable or you might need to drill a hole in the wall, if using a new cable. If you’re unable to do that, we sell a flat cable that can be placed in a door or window and still allow it to close properly.
Once the cable is inside your home, connect it to the power supply of your pre-amplifier. Now run another cable out of the power supply to your television or a splitter, if you’re using multiple televisions. If you did not purchase a pre-amplifier, than connect the cable to your television or splitter.
Step 4: Hook-Up and Configuration of Your Televisions
Now that we have the wiring out of the way, let’s get to the fun stuff! Basically, if your television is made after 2007, you will not need to purchase a converter box to watch free local broadcasts. If your television is older, we sell a converter box, which allows your television to be able to receive the digital signal from your antenna.
What itf you’re not sure about the age of you television? You may need to look through your manual to see if it uses a ATSC tuner card. If it does, you will not need a converter box; however, if it has an NTSC tuner card, you’ll need a converter box. Once you hook the coaxial cable to the back of your television, change the input on your TV to the proper location, then run a channel scan. If you have never completed a channel scan before, look through your TV manual for instructions. Usually, you need to go into the menu and find the channel scan option. The menu might look similar to the one listed below:

When running a channel scan, make sure to choose the digital scan option if that’s given. The television needs to scan for the analog and digital channels in order for you to get everything that’s available.
You’re Done!
Once your channel scan is finished, your TV should be ready to go. At this point, if your stations aren’t working, retrace your steps. If you’re unable to figure out the problem, give us a call at [email protected] or send us an email at [email protected]. You also can ask questions on our Facebook Group.

Be the first to comment on "TV Antenna Installation Guide"