

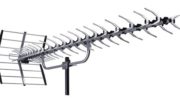
It’s the easiest way to mount an antenna or satellite dish on the eave of your house. It’s one of the most flexible and easy to use mounts on the market. But is there really something mysterious about it? I was surprised to find that several people I knew didn’t really understand what a J-mount is, or even why it’s called that.
A picture is worth 1000 words
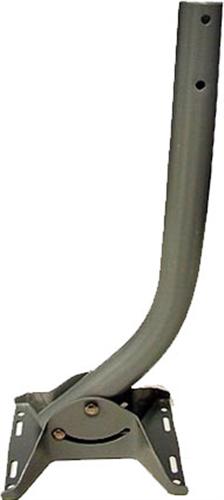
This is a J-mount. It’s called that because the slight bend in it gives it a bit of a J shape. It’s really nothing but a tubular piece of steel with a bend in it, some holes, and a mounting plate.
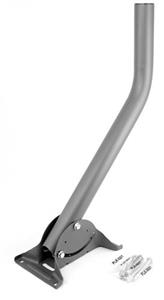
Right off the bat I’ll tell you that some people will tell you that the best way to assemble a J-mount is to have the short part at the top and long part at the bottom.
Truth is there is no bad way to assemble a J-mount, it just has to do with what you need. If you put the long part at the bottom, it swings further away which may help you clear the edge of the house a little better. You might need that if you have aiming problems.
What is a J-mount good for?
A J-mount has a nice wide base which makes it very stable no matter where you mount it. You can mount it vertically like this, with the plate up against the house or eave:
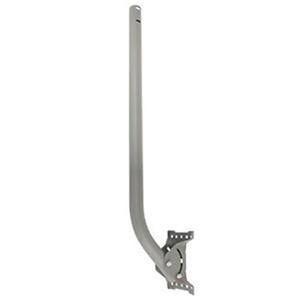
and in fact this is the most common way to mount it. Putting the mount on an eave means the least possible damage to your home. However it can also be mounted on any surface even a slightly slanted one like if you have wood siding.
A J-mount can also be put on the roof although I don’t tend to like doing that. Putting extra holes in your roof when you don’t need them just seems like a bad idea. If you do need to mount to a roof, use pitch pads which will seal the hole up really well.
Choosing the right J-mount
Generally you’ll choose a mount based on the thing you want to mount. Most antennas are pretty flexible in terms of what kind of post you can use. However, satellites aren’t. Older satellite dishes and all DISH dishes use a 1.66″ outer diameter mount, while today’s DIRECTV dishes use a 2″ outer diameter mount. Most antennas won’t work with that 2″ mount unless you do some really weird things to get them there. I don’t recommend that.
Proper installation of a J-nount
Basically it just bolts onto whatever you want to bolt it onto. From there, adjust the bolts that connect the pole part to the bracket part until the pole part is plumb. Tighten everything down and you’re pretty much done.
Our marketing team created a video which explains it even better.
Once the J-mount is in place it should stay stable for years to come.
Get a J-mount from Solid Signal
You’ll find the best selection of J-mounts, as well as all sorts of other mounting supplies, by checking out SolidSignal.com. If you need help choosing a mount, call us at [email protected].
Be the first to comment on "What is a J-mount?"