
Here’s a question for you: If you’re installing a cell booster in your vehicle, and it has an aluminum body, how do you install the outside antenna? The antenna is magnetic, but it won’t stick to a vehicle with a body made of non-ferrous material. So what do you do?
There is always the NMO (Non-Magnetic Option) antenna, but installation involves drilling a hole in the vehicle roof or trunk lid. Who wants to have a permanent hole in their vehicle?
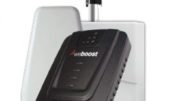
Fortunately now there an easy option from weBoost for installing a magnetic antenna to aluminum-body vehicles. This method just takes a few minutes, and best of all, unlike an NMO antenna, the installation is NOT permanent. You can remove it anytime you want to.
The weBoost solution is an adhesive disc, which now comes in the box for those booster kits that include a magnetic antenna. The double-sided adhesive disk adheres to aluminum vehicles and firmly holds the antenna in place.
The disk can also hold an antenna on a fiberglass-bodied vehicle, but you would need to provide a metal ground plane for the antenna to work properly.
Installing the magnetic antenna
Installing the disk is a breeze and takes only a couple of minutes. Here are the steps:
1. Clean the area on vehicle where you want to place the antenna. Make sure the antenna will be at least 12 inches from any other antennas and at least 6 inches from any glass, including windows and sunroof.
2. Remove the clear film and press the disk in place on the vehicle in the location you’ve chosen.
3. Then remove the white film from the disk and place the antenna on it. Press it firmly in pace.
That’s it!
You can mount the antenna on a vehicle’s trunk lid, rather than the roof, if you choose. Just be aware that antenna location will result in decreased performance from your booster system.
Antenna removal
Removing the disc is equally easy. Here’s all you have to do:
1. First remove the antenna from the disk.
2. Then clean the area around the disk to remove dust and anything else that might scratch vehicle’s paint during removal.
3. Remove disk by hand or with a non-marring plastic scraper tool.
4. Next, spray Turtle Wax Tar & Bug Remover on the adhesive area remaining on the vehicle. Follow the directions on the bottle.
5. With a microfiber cloth or a soft terrycloth gently rub the adhesive until it’s completely removed.
6. Buff the area with a clean microfiber cloth or terrycloth.
If adhesive residue remains on the vehicle, repeat steps 3 – 5 above until completely removed.
Reprinted with permission from the weBoost blog.


Be the first to comment on "How to Attach a Magnetic Antenna to an Aluminum Vehicle"