
Note: this article is for the DIRECTV Gemini for Satellite. To convert a Gemini for Internet or Gemini Air, simply press the home button, go to the gear, and find the wireless settings.
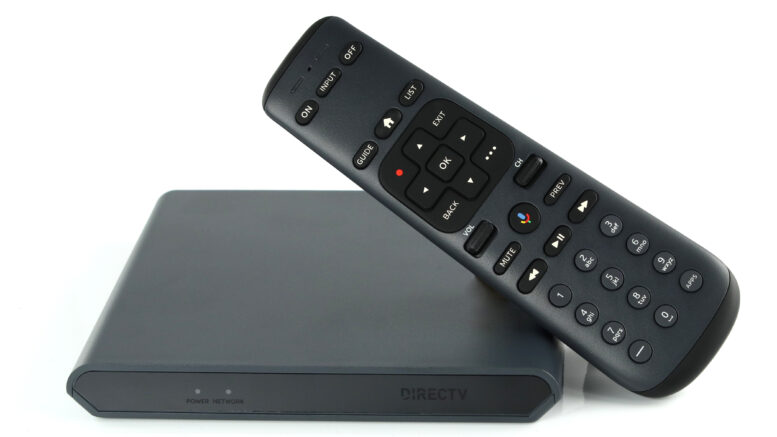
If you have a DIRECTV Gemini for Satellite, you may want to take it to a different room where you don’t have a coax cable. This really isn’t a problem, since the Gemini has both a wired and a wireless adapter in it. However, you’re going to have to take some steps to reconfigure your Gemini to use Wi-Fi instead of wired networking. It’s not as simple as choosing a new network.
Step 1: Resetting your remote and Gemini
Before you start, turn on your TV so you can see what the Gemini is doing.
In order to use your remote with your Gemini after you have changed it, you’ll need to reset it. Luckily, it’s very easy to do.
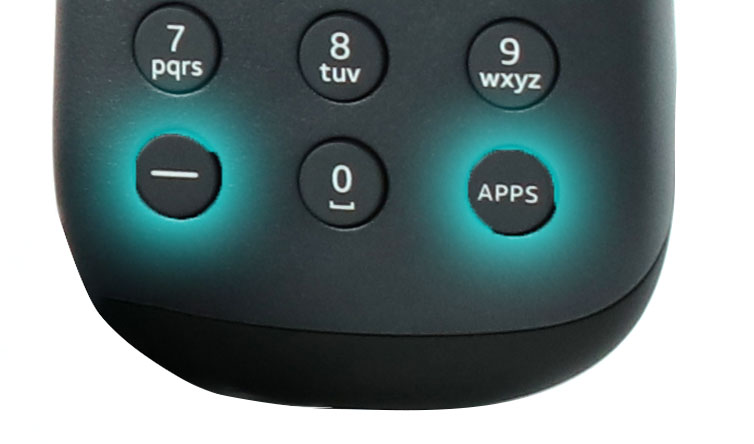
Just press and hold the — and APPS buttons together for a few seconds. The lights at the top of the remote will flash blue and then you can let go of the buttons.
The next step is to factory-reset the Gemini. This is the only way to force it to go into setup mode so you can connect a wireless network. Again, this is quite easy to do.
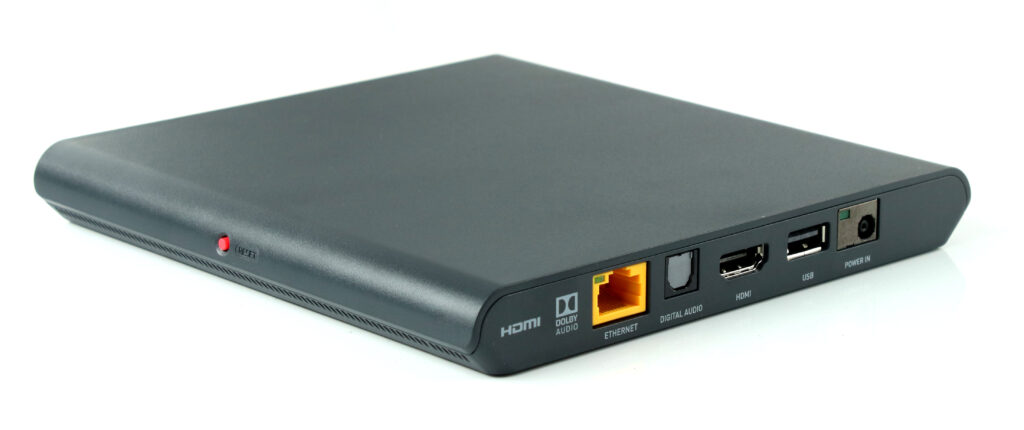
First, disconnect the Gemini’s Ethernet connection. You will get a message on the TV that it’s waiting for signal. This is ok. There’s a red button on the side of the Gemini. Hold this in for about 30 seconds. When you see a message on the TV saying your Gemini is resetting, you can let go of it. This will reset your Gemini to a factory-fresh state so it can get new network settings.
Step 2: Basic Gemini Setup
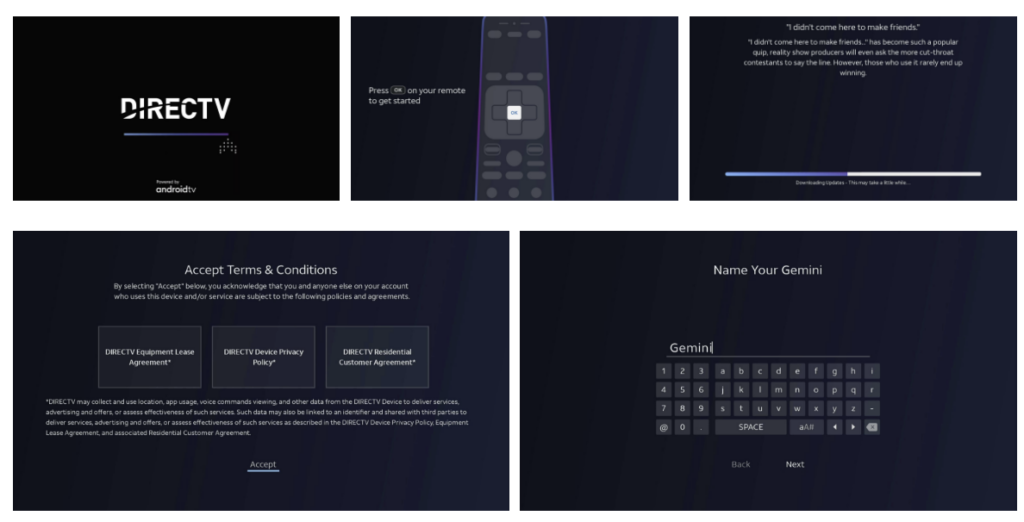
You will have to go through most of the initial setup as if you were setting it up for the first time. This will include pairing the remote. The Gemini seems to remember a few things like your favorite channels and its name, but you will still have to agree to everything and it will still check for updates. But first, you’ll want to connect the network.
DEEP DIVE: Which network to connect to
There’s a lot of confusion as to whether or not the Gemini should be connected to your home Wi-Fi or to the Genie directly. DIRECTV’s own tutorials don’t make it easy because some of them apply to the Gemini that’s only for internet, and they don’t tell you that.
Using your home Wi-Fi
If you want to use your home Wi-Fi instead of DIRECTV’s own networking, it will generally work. Sometimes, if other people in your home are using the internet heavily, you may see some choppiness in the video. But it’s up to you if you want to do it that way.
Using DIRECTV’s own wireless networking
The most reliable way to make it all work is to use DIRECTV’s wireless networking. It’s a separate network that doesn’t have any other traffic on it. So, it should function very well. If you have a Genie 2, you have this function built in. However, if you have an HR54 Genie 1, you will need to add a wireless video bridge in order to make it all work.
If you need a wireless video bridge, it connects via coax and should be put within 50 feet of the Gemini you want to connect it to.
Think ahead
It’s not impossible to change from home Wi-Fi to DIRECTV’s wireless networking, but the safest way to do it is to go through the whole process including resetting the client so it might be a good time to decide how you’re going to wire things.
Step 3: Connecting the Client
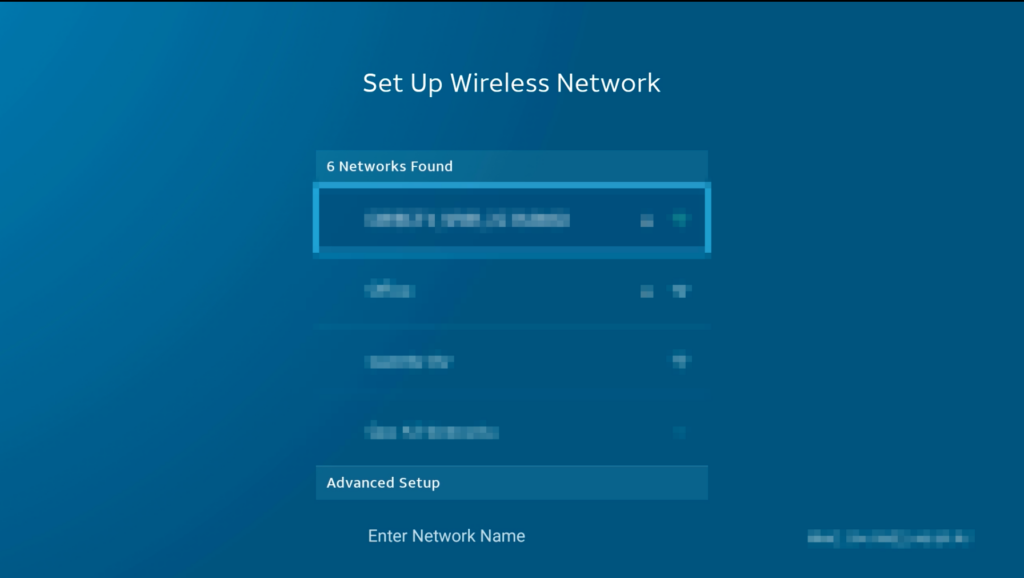
You’ll get to the point in the Gemini setup where it will ask you which network to connect to. If you are connecting to home networking, select your home network and enter the password.
If you are connecting to your Genie, arrow down until you see USE WPS. Press the OK button on your remote to enter pairing mode.
With an HR54
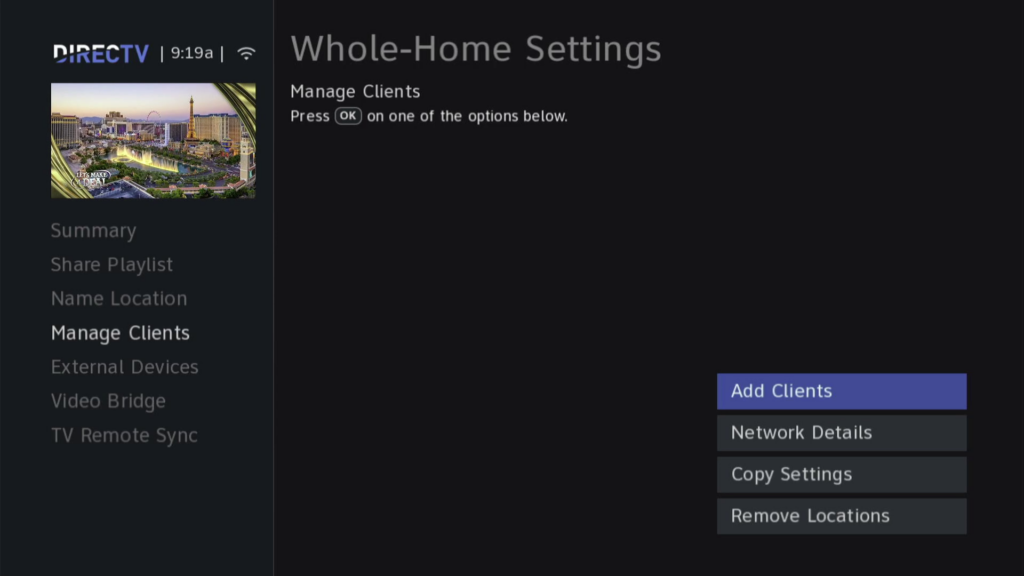
With an HR54, go to the HR54 and press MENU, Settings, Whole Home, Manage Clients. Choose Add Clients. This will put the wireless video bridge into pairing mode.
With a Genie 2
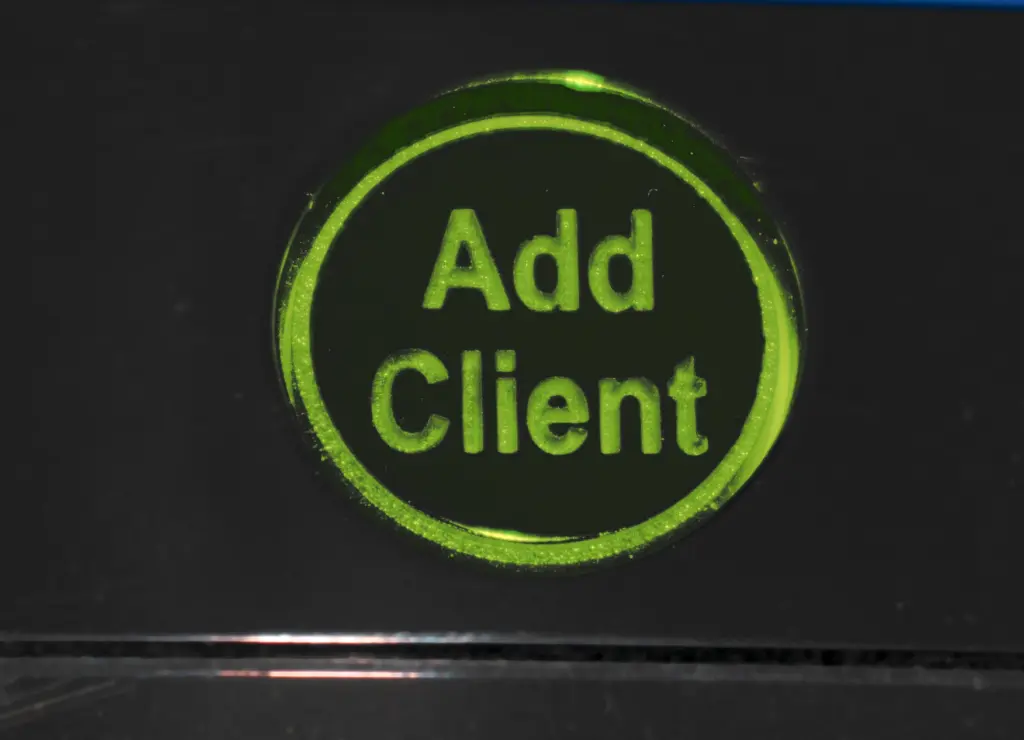
You can do it the same as the HR54, but it’s easier to use the Add Client button at the top of the Genie 2. Press it and it will begin to flash.
In either case, it should take about 30 seconds before the connection is made and everything works. If it doesn’t work properly, try moving the Gemini closer to the Genie if possible.
After that…
From there you will be prompted to accept your agreements, and the Gemini will reboot at least once. Once it’s done, you should be ready to watch TV.
You may need to reprogram your remote to your TV. I know I did. This is easy. Press HOME, Settings, Remote Control, and go through the steps from there.
Changing it back to wired mode
Honestly, changing the Gemini back to wired mode was very simple. I reset the remote, connected the Ethernet cable, and factory reset the Gemini. Most of the steps were the same as what you see above, but I didn’t have to ask the Genie to add a client or select a wireless network.
Ready to upgrade?
When you’re ready to upgrade your DIRECTV system, call the experts at Solid Signal! We’re here for you during East Coast business hours. Email us at [email protected]. If it’s after hours, fill out the form below. We’ll get right back to you!


Be the first to comment on "How to change a DIRECTV Gemini from wired to wireless mode"