
In the early days of DIRECTV satellite, it was all DIY. Even the installation was done by the homeowner. That spirit of DIY is still alive and well over 20 years later. Thankfully some of those tasks are a lot easier than they were in the past.
If you have a Genie
Satellite setup for Genies is automatic. Reboot and the Genie should detect the new setup.
Satellite Setup for non-Genie receivers
If you have a DIRECTV HR24, H24, H25, or older receiver and are upgrading your dish, it’s easier than ever before to make sure the receiver has the right information. In many cases, simply rebooting the receiver will cause it to get the right information. However, if you do need to go into manual setup, there are now an easier set of steps to take.
Ignore older tutorials
If you’ve seen other tutorials, including those on this blog, dated 2016 or earlier, they’re no longer accurate. The new process is simpler. Here are the basics.
Step 1

With your DIRECTV receiver powered up and showing on your TV, press MENU then follow these steps:
- Settings & Help
- Settings
- Satellite
- Repeat Satellite Setup
- Press DASH to get past the warning screen
Step 2
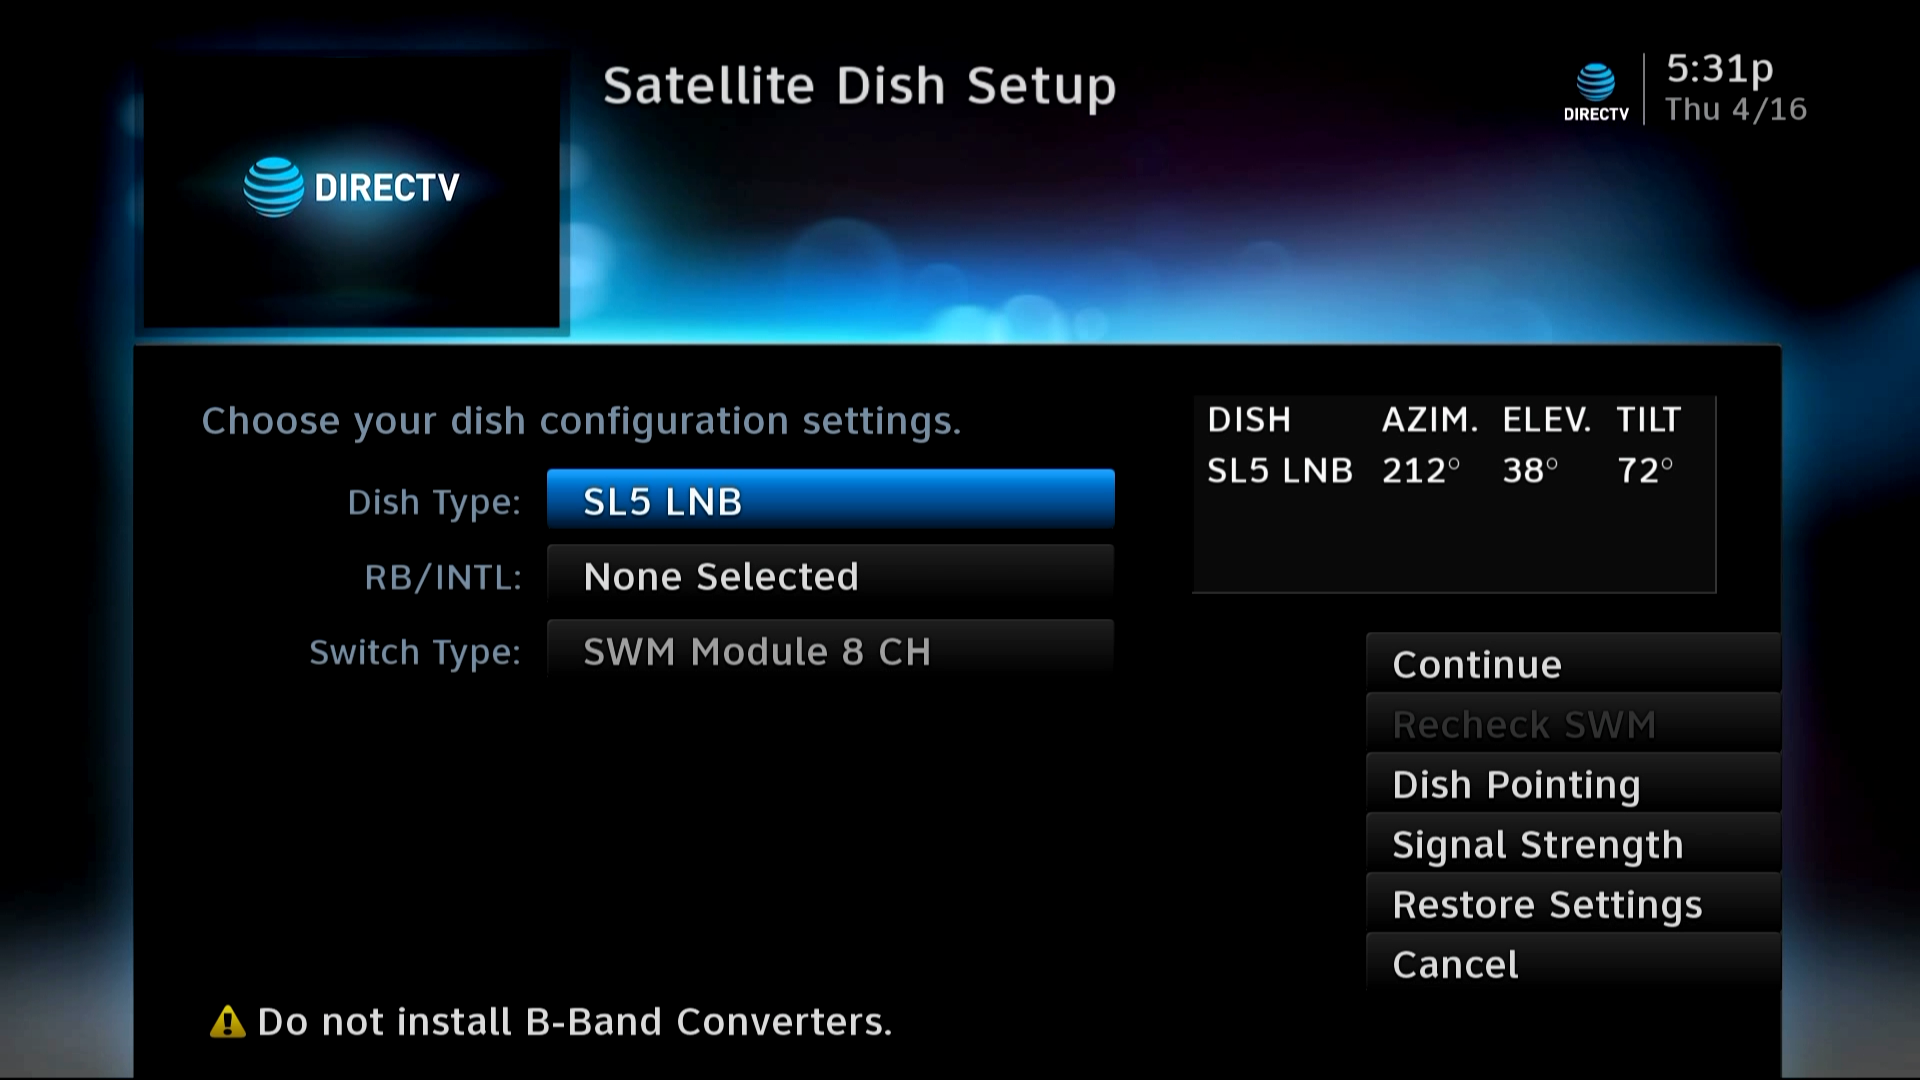
You’ll see a configuration screen similar to this one. Your options may be different.
Dish Type
Here you have only four choices:
- SL3 LNB
- SL5 LNB
- 18×20
- 18″ Round
In the past there were as many as 25 choices. You probably know the right choice based on what you bought. For RV and boat users with older domes, “18×20” is usually the right choice.
RB/Intl
This option helps you set whether or not you have a 4K dish or international dish. You’ll need one of these in order to get access to international channels, but you don’t need both.
If you have a 4K LNB, choose “Reverse Band.”
If you have a second dish for international channels, choose “International.”
Switch Type
This is set automatically. If you think it’s set wrong and you have the ability to press “Recheck SWM” that will help. Otherwise reboot and the receiver will check the SWM.
Step 3

After you press Continue, you’ll have to wait a minute or more for guide data to load. After that you can choose Watch DIRECTV and you should be all set
If it doesn’t work
First, try rebooting the receiver and going through the process again. You may need to “Reset Everything” (see this tutorial) but be aware that this will erase your favorites lists, all your settings, and DELETE ALL YOUR RECORDINGS.
A couple of videos
Here are a couple of videos that take you through the process. They may be helpful especially if you don’t know what dish you have.
If you’re ready to upgrade your DIRECTV system, call us at [email protected] or shop at Solid Signal for the best selection of satellite TV accessories!
Be the first to comment on "2021 Edition: Satellite Setup for non-Genie DIRECTV receivers"