

This article originally appeared in the weBoost blog.
Are you tired of spotty cell phone reception while on the road? Whether you’re embarking on a cross-country road trip, enjoying an off-road adventure, or simply commuting to work, staying connected with solid cell coverage is crucial. That’s where weBoost can help with a vehicle mounted cell phone booster. Featuring state-of-the-art boosters like the Drive Reach Overland, weBoost can help you obtain robust cell signal regardless of your location, from rocky terrains to secluded valleys.
In this guide, we’ll walk you through the installation process of your weBoost vehicle mounted cell phone booster, ensuring that you can confidently set up your device and enjoy uninterrupted service.
Understanding your booster kit: what’s inside the box?
When you open up the weBoost signal booster kit, you’re welcomed by a host of components designed for enhancing your on-the-road cellular experience. For example, let’s take a look at the items packed inside the Drive Reach Overland:
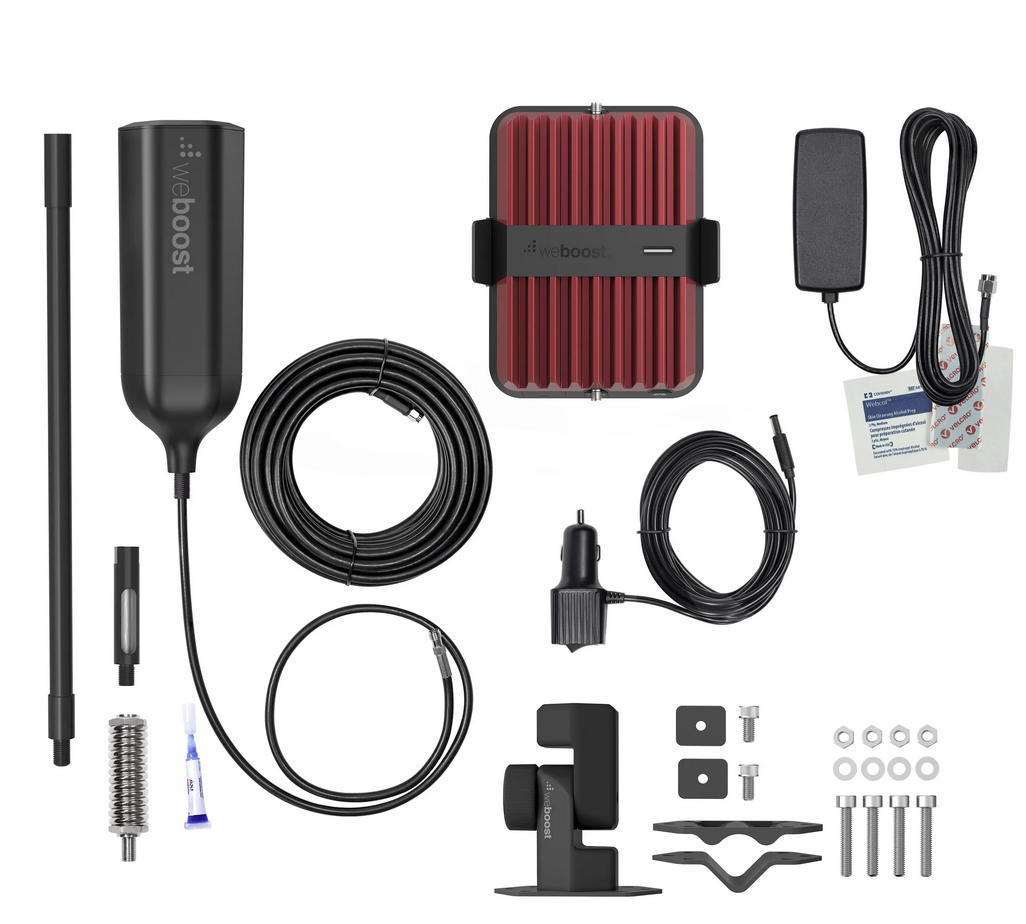
- Drive Reach booster: The heart of the system, this booster amplifies weak signals to give you consistent cell coverage on the road.
- Overland antenna: Outside, a rugged, omni-directional antenna designed to capture cellular signals from all directions, even in remote areas or challenging terrain.
- 13-inch mast extension: This extension aids in elevating the Overland Antenna, ensuring a better signal reception free from potential obstructions.
- Overland mounting bracket: This sturdy bracket that securely holds your Overland Antenna in place, but its most unique feature is that it allows you to fold the antenna down when you’re not using it. This keeps it out of the way while driving or entering your garage. When you need to use it, just flip it back up.
- Inside dash antenna: Designed to be discreetly placed inside your vehicle, this antenna broadcasts the amplified signal from the Drive Reach Booster, ensuring strong cell reception within your vehicle.
- 14-foot LMR cable: This high-quality cable connects your Overland Antenna to the Drive Reach Booster, transmitting the captured cellular signal for amplification.
- CLA power supply: A power source that provides the necessary energy for the Drive Reach Booster, ensuring it operates seamlessly while you’re on the move (a hardwire kit is also available).
Step-by-step guide for installing a vehicle mounted cell phone booster
1. Perform a test install
Perform in a test run before the actual installation. This not only provides insight into how all the components connect, but also helps decide the most effective position for your booster.
2. Determine the booster’s placement
Select an easily accessible spot for your booster, like underneath a seat. This location should offer proper ventilation and be devoid of any airflow obstructions. Remember, no part of the booster, its antenna, or cables should ever be placed in an area where it could hinder the deployment of an airbag.
3. Set the external magnetic antenna
First, ensure the roof surface is clean where the antenna will be situated. Ideally, place the antenna around the center of the roof, ensuring a minimum 12-inch distance from windows and other antennas. Make sure the antenna stands vertically for the best results.
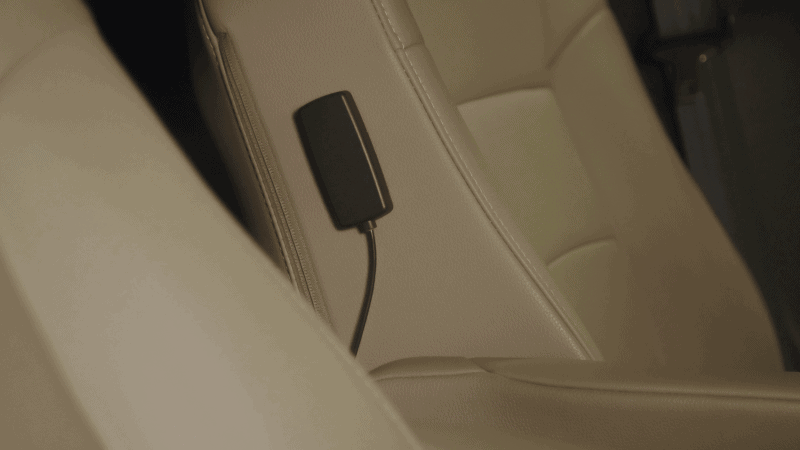
4. Install the internal antenna
Choose a strategic location for the internal antenna that does not interfere with airbags, such as the side of a seat or the dashboard. If you frequently travel with passengers, a central placement ensures signal distribution to all. Utilize the adhesive strip provided to mount the antenna.
Guidelines for placement:
- The internal antenna should be placed between 18 and 36 inches from the cell phone’s location.
- Steer clear of areas where airbags deploy.
5. Connect antenna cables to the booster
Before making connections, ensure the power is off. Connect each antenna to its designated port on the booster. Avoid connecting an antenna to the powered booster, as this could cause damage.
6. Lead the power cord to the power outlet
Hide any extra cord length by tucking it into the weather stripping of a door, ensuring a neater look and reducing cord wear. The placement of the cord varies based on vehicle type:
- For sedans: Direct the cord to the rear side door. Always remember to detach the antenna when using a car wash.
- For SUVs, hatchbacks, and vans: Lead the cord to the top of the hatchback door.
- For trucks: Route the cord through a side door.
Caution: Always disconnect the power cord from the outlet before connecting it to the booster. The power cord should first be attached to the booster and then to the power outlet.
7. Finalize the installation of your vehicle mounted cell phone booster
After ensuring all components are correctly connected, plug in the power cord. Once powered, the indicator light on the booster will illuminate green, and the adapter’s light will show red.
Installation tips:
- If your vehicle features a sunroof, ensure a minimum distance of five feet between the antennas. This helps prevent booster overload.
- Maintain a distance of at least 10 inches between the external antenna and any person during regular usage.
- If your vehicle has an aluminum roof, an adhesive disk is provided in the kit to assist with mounting the outside antenna. However, if the antenna can magnetically attach to your vehicle’s roof, there’s no need to use the adhesive disk.
Leverage the weBoost app
For a seamless experience, download the weBoost app. It offers real-time signal strength monitoring and helps fine-tune your setup with full videos and interactive installation guides to help you with your vehicle mounted cell phone booster.
If you ever find yourself in a bind, our U.S.-based support team is ready to assist. Whether you have questions about installation, the weBoost app, or anything in between, our experts are only a phone call away.
Top picks: vehicle cell phone signal boosters
Here’s a breakdown to help you decide:
Cars and SUVs
The Drive Reach is optimal for passenger cars and SUVs, providing superior reception. It’s suitable for both everyday commutes and more isolated spots.
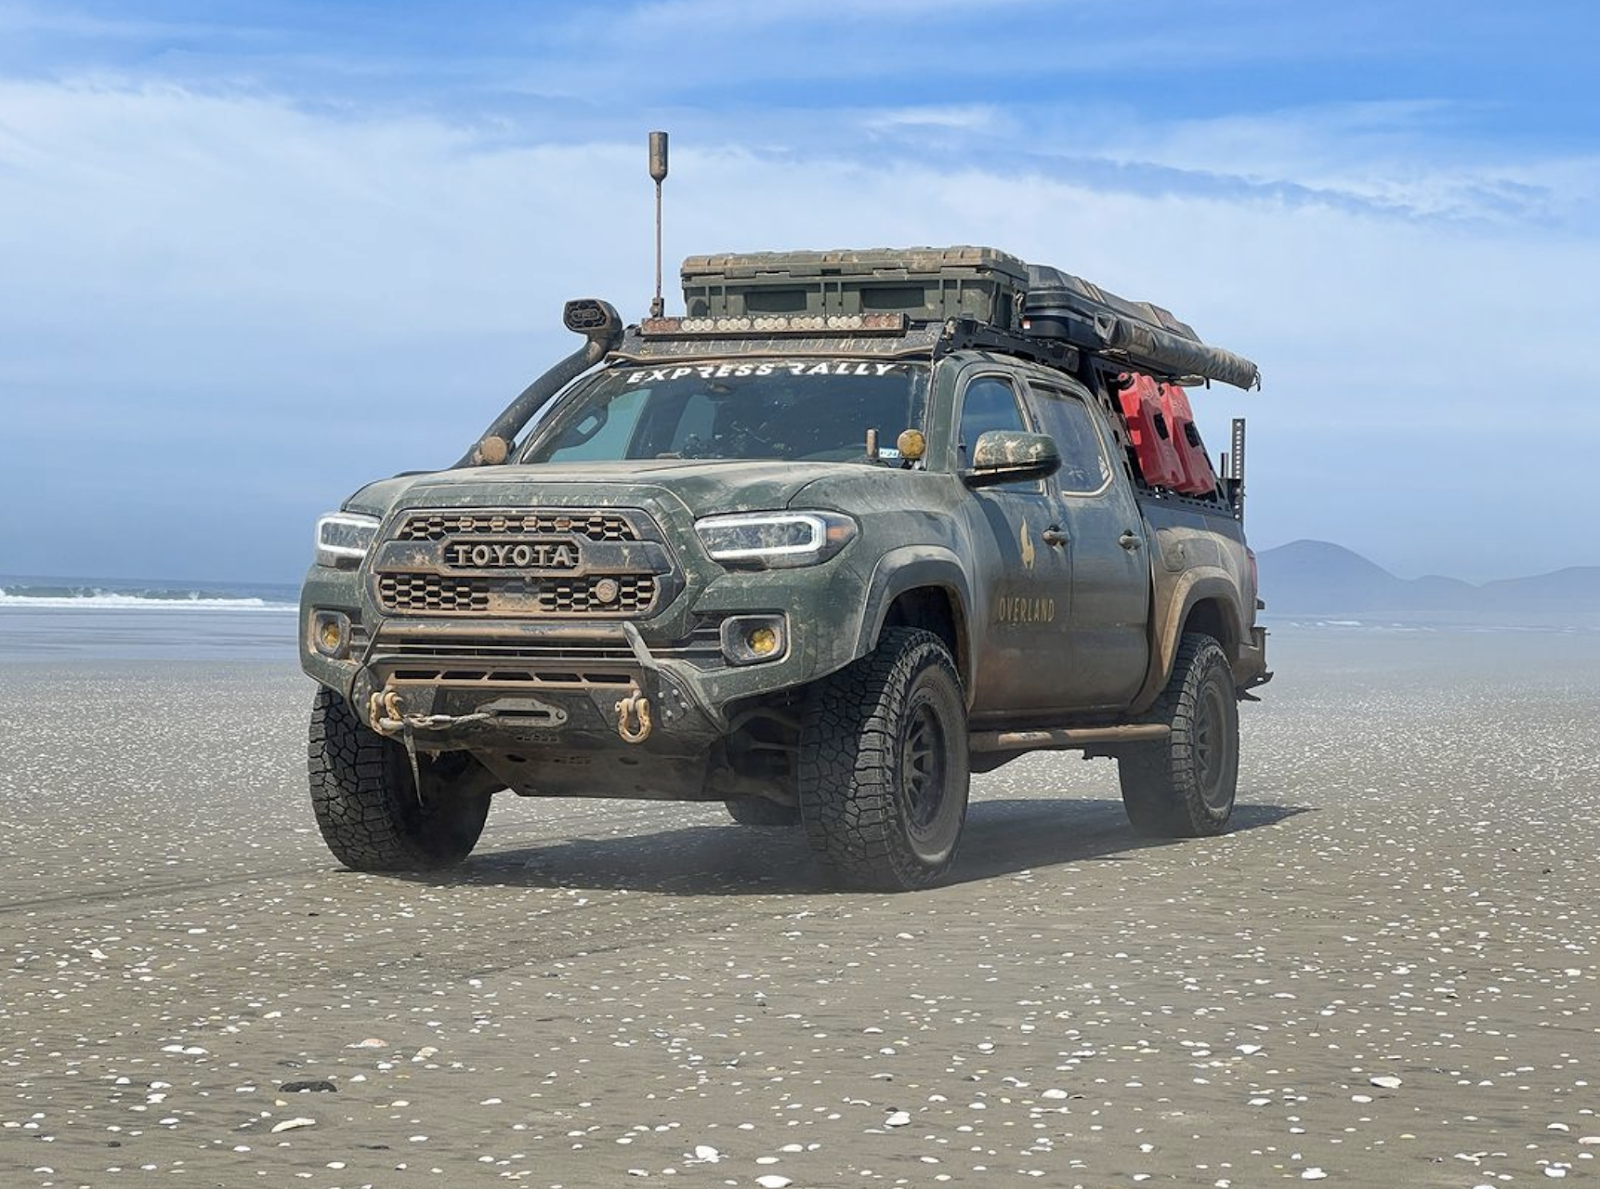
For adventurers, the Drive Reach Overland ensures potent signal enhancement even in remote areas. Its flexible external antenna mount can be adjusted to bypass any obstacles. If you’re into custom rig setups, the Drive Reach Overland offers flexibility for those intricate modifications.
For solo drivers, Drive Sleek is a good choice. Its adaptable cradle-style internal antenna can accommodate most phones.
RVs
Both Drive X RV and Drive Reach RV bolster cellular signal strength for multiple users in moving or stationary RVs, campers, and trailers. For stationary use, the Destination RV focuses on the closest cellular tower to ensure strong coverage once you’ve set up camp.
Trucks
Single drivers can opt for Drive Sleek OTR. It boasts an adjustable phone cradle, a magnetic vent clip, and is compatible with various CB-antenna mounts. For consistent reception for multiple users or devices, especially in remote areas, Drive Reach OTR is the go-to choice.
Drop off the map, not off your call
Whether you’re on Verizon, T-Mobile, AT&T, or any other network, the weBoost cell phone signal booster ensures seamless connectivity. Upgrade your journey. Shop vehicle cell phone signal boosters today!


Be the first to comment on "Installing Your Vehicle Mounted Cell Phone Booster"