
Special thanks to forum member PhoenixAZ for this tip!
You know you want to connect your DVR to the internet. There’s just so much good stuff out there. On Demand, YouTube videos, Pandora… it gives you a lot more choice, and it’s worth it. Back in the mid-2000s, DIRECTV didn’t make it easy. Sure, they put ethernet ports on all their equipment but who has a network jack in every room? People put together their own kits or used DIRECTV’s choice, a Linksys bridge. It didn’t work very well.
This all changed when SWM technology came on the scene. All of a sudden you could use coax networking to connect all the receivers in your home, as long as you used one point of connection, called a Cinema Connection Kit (or Broadband DECA.) This was a massive improvement and made it possible for more people to use whole-home DVR and share in all the internet-connected goodness. (Looking for more information on Coax Networking? Here’s our White Paper.)
Still, in order to make it all work, you needed that extra box. It just sat there, gathering dust, looking messy. DIRECTV realized they could do better, and here’s how.
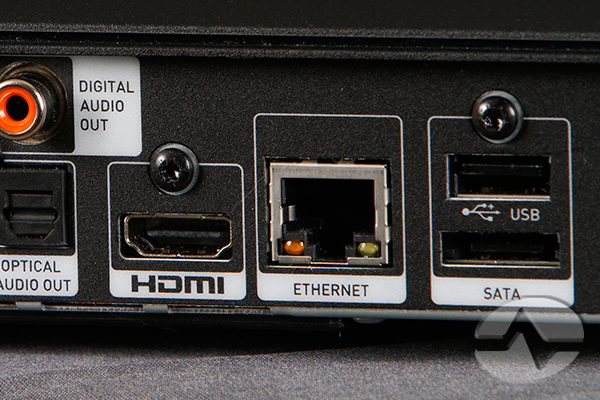
If you have an HR34 Genie DVR in a room with wired internet, ditch that Cinema Connection Kit. You don’t need it. Just plug the cable straight into the Genie DVR and reboot it. Voila! The Genie has a built-in connection kit that lets you share internet with all your other receivers just by plugging the cable in.
What about the HR44 Genie DVR? Why, it makes the process even easier. It has built-in wi-fi so if it’s in range of your router, it can connect wirelessly and provide internet to the rest of your receivers. How? Here’s the step-by-step.
- If you are currently using a Cinema Connection Kit, disconnect it, making sure to terminate the unused connection.
- Reboot the HR44.
- Press {MENU}, arrow to “Settings and Help,” and press {SELECT}.
- Make sure “Settings” is highlighted and press {SELECT}.
- Arrow down to “Network Setup” and press {SELECT}.
- Make sure “Connect Now” is highlighted and press {SELECT}.
- When you’re asked how you want to connect, highlight “Wireless” and press {SELECT}.
You’ll need to know your wireless password or passphrase but once you enter it, that’s it! Internet for everyone! This technique is sure to save money and time, and eliminate an unsightly black box.


Be the first to comment on "TIP: Connect your Genie to the internet without a Cinema Connection Kit!"